#90daysofdevops #29:Jenkins Important interview Questions.
| Continuous Integration | Continuous Delivery | Continuous Deployment |
| CI is an approach of testing each change to codebase automatically. | CD is an approach to obtain changes of new features, configuration, and bug fixes. | CD is an approach to develop software in a short cycle. |
| CI refers to the versioning of source code. | CD refers to the logical evolution of CI. | CD refers to automated implementations of the source code. |
| CI focuses on automation testing to determine that the software has no errors or bugs. | Focuses on releasing new changes to your clients properly. | Emphasis on the change in all stages of your production pipeline. |
| CI is performed immediately after the developer checks-in. | In CD, developed code is continuously delivered until the programmer considers it is ready to ship. | In CD, developers deploy the code directly to the production stage when it is developed. |
| It helps you to identify and rectify issues early. | It allows developers to check software updates. | It enables you to rapidly deploy and validate new features and ideas. |
| It uses unit tests. | It uses business logic tests. | Any testing strategy is performed. |
| Development team sends continuous code merging requests even when the testing process is running. | You deliver code for review that can be batched for release. | Deploy code using an automated process. |
| You require a continuous integration server to monitor the main repository. | You require a strong foundation in continuous integration. | You need a good testing culture. |
Benefits of CI/CD
1. Tight Feedback Loop
2. Fast Go To Market
3. Collaboration And Communication
4. Fault Detection And Isolation
5. Increased Test Reliability
6. Lower Risk
7. Short Review Time
8. Efficient Infrastructure
9. Measurable Progress
10. Cost Reduction
11. Improved Mean Time To Resolution (MTTR)
12. Maximum Productivity
13. Easy Way To Produce
2.What is meant by CI-CD?
CI/CD is a method to frequently deliver apps to customers by introducing automation into the stages of app development.
A pipeline is a process that drives software development through a path of building, testing, and deploying code, also known as CI/CD.
3.What is Jenkins Pipeline?
Jenkins Pipeline is a collection of jobs or events that brings the software from version control into the hands of the end users by using automation tools. It is used to incorporate continuous delivery in our software development workflow.
4.How do you configure the job in Jenkins?
Step 1: Create a New Freestyle Project
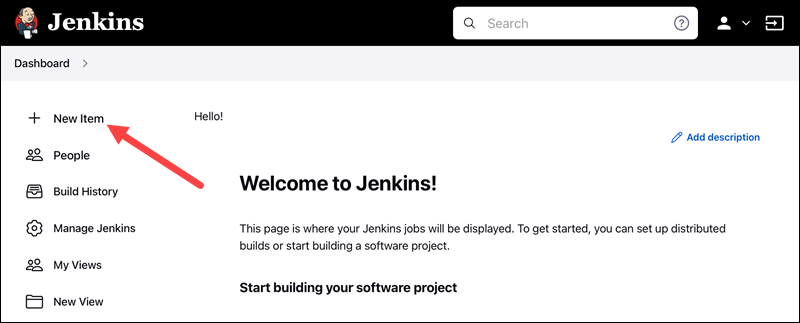
1. Click the New Item link on the left-hand side of the Jenkins dashboard.
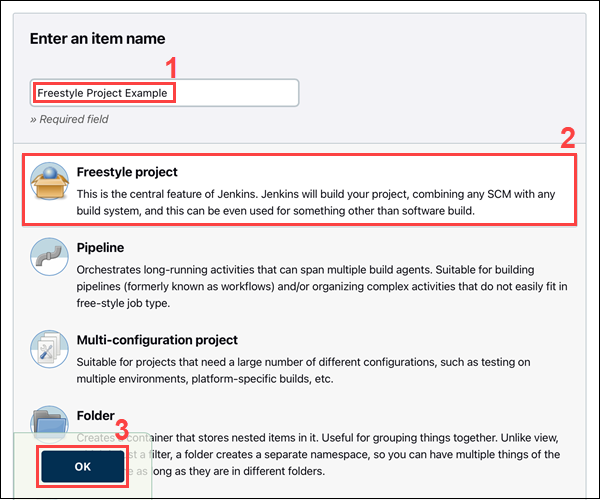
2. Enter the new project's name in the Enter an item name field and select the Freestyle project type. Click OK to continue.
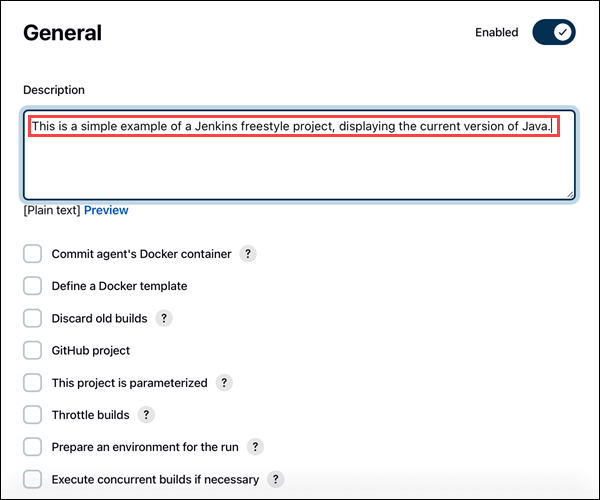
3. Under the General tab, add a project description in the Description field.
Step 2: Add a Build Step
1. Scroll down to the Build section.
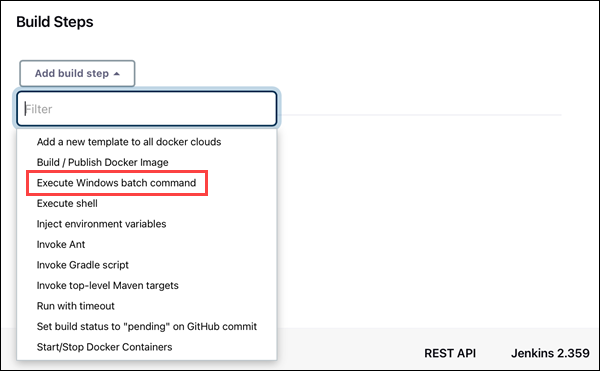
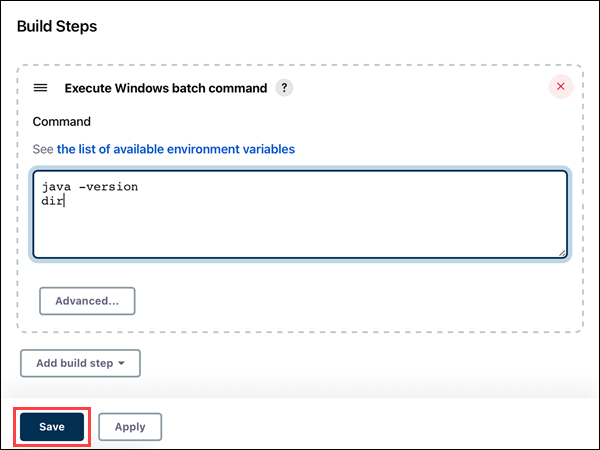
2. Open the Add build step drop-down menu and select Execute Windows batch command.
3. Enter the commands you want to execute in the Command field. For this tutorial, we are using a simple set of commands that display the current version of Java and Jenkins working directory:
java -version
dir
4. Click the Save button to save changes to the project.
Note: Need a cheap sandboxing environment with automated OS-deployment options? See how easy it is to deploy a development sandbox for as little as $0.10/hour.
Step 3: Build the Project
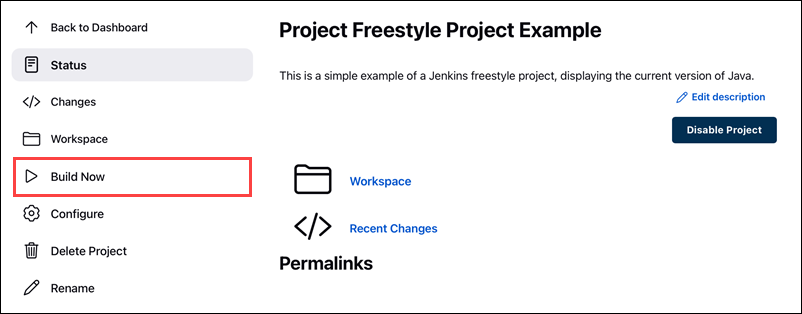
1. Click the Build Now link on the left-hand side of the new project page.
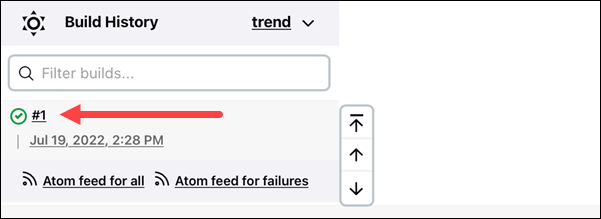
2. Click the link to the latest project build in the Build History section.
3. Click the Console Output link on the left-hand side to display the output for the commands you entered.

4. The console output indicates that Jenkins is successfully executing the commands, displaying the current version of Java and Jenkins working directory.
6.Where do you find errors in Jenkins?
The pipeline where failure occurred, in the pane, select the latest build, and click Console Output. On the Console Output page, check the logs to find the reason for the failure.
7.In Jenkins how can you find log files?
To view a Jenkins log file, open it with a text editor of your choice. Below are the default locations of Jenkins log files depending on the operating system.
Jenkins UI
By default, Jenkins keeps a constant log of all activity as a part of the Jenkins dashboard.
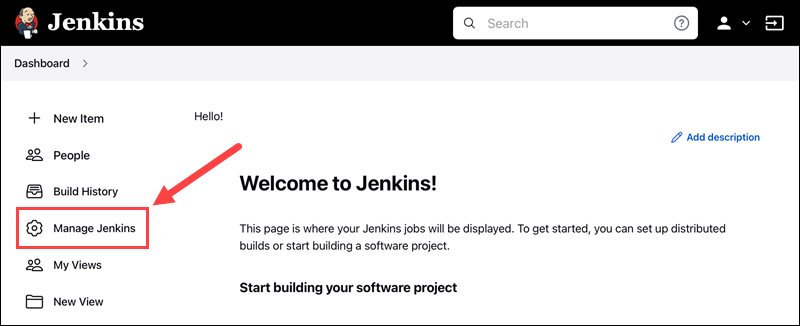
1. To access this log, click the Manage Jenkins link on the right-hand side of the dashboard.
2. Click the System Log button in the Status Information section.
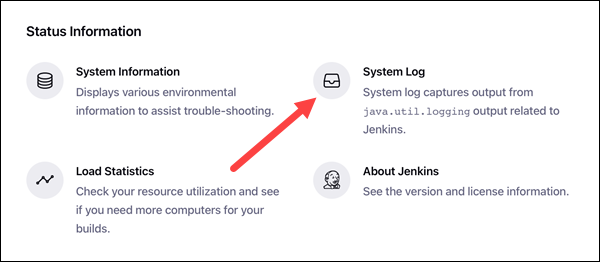
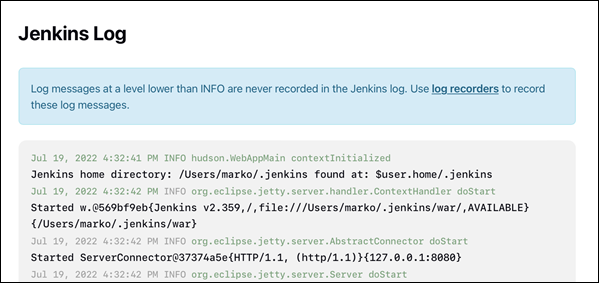
3. Click the All Jenkins Logs link to access the default log.

Each line of the log details the time and date of the action, the level of logging, the element of Jenkins performing the action, and the action being performed, followed by a brief description.
Note: Logs for individual project and pipeline builds are available in the build's Console Output section. Learn more about creating pipeline builds in our ultimate guide to Jenkins environmental variables.
Linux
The default location for Jenkins logs on Linux is /var/log/jenkins/jenkins.log. To view the log file, open it using a text editor such as Nano:
sudo nano /var/log/jenkins/jenkins.log
Windows
On Windows, Jenkins log files are stored as jenkins.out (console output logs) and jenkins.err (error logs) in the Jenkins home folder.
Note: Jenkins logs may be stored in the Jenkins installation folder in Program Files on some Windows systems.
The location of the Jenkins home folder is specified during the installation. The default location is C:\ProgramData\Jenkins\.jenkins.
Important: The ProgramData folder is hidden by default. Make sure you enable viewing hidden items before trying to view Jenkins logs.
If you are not sure which folder you set as the Jenkins home folder, click the Manage Jenkins link on the left-hand side of the Jenkins dashboard.
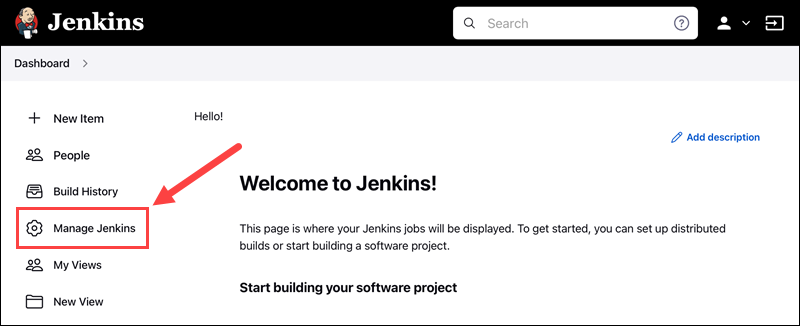
Under the System Configuration section, click the Configure System button.
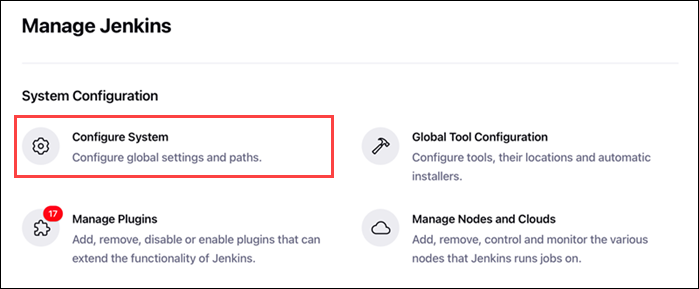
The location of the Jenkins home folder is listed at the top of the page, under Home directory.

MacOS
On MacOS, Jenkins logs are located at /var/log/jenkins/jenkins.log by default:
sudo nano /var/log/jenkins/jenkins.log
Docker
Viewing Jenkins logs in Docker requires running Jenkins inside a detached container. Open Jenkins logs using the Docker logs command and the ID for the detached container:
docker logs [container ID]
How to Enable Debug Logs in Jenkins?
Jenkins allows users to set up new log recorders when using the System Log page. These recorders collect and display information on specific elements of your code and you can fine-tune them to provide a more detailed output.
Having a more detailed log available makes it easier to spot and determine the cause of potential errors in the code. This is very helpful when debugging issues.
1. To set up a new log recorder, first click the Add new log recorder button in the Log Recorders section of the System Log page.

2. Next, enter the name of the new log recorder and click the OK button. For this example, we will name our log recorder Dig Debug.

3. To customize the output the new log recorder collects and displays, click the Add button to add a new logger. Use the input field to search for an element and select the log level from the drop-down menu. It is generally best to use the ALL or FINE logging level for debugging purposes.
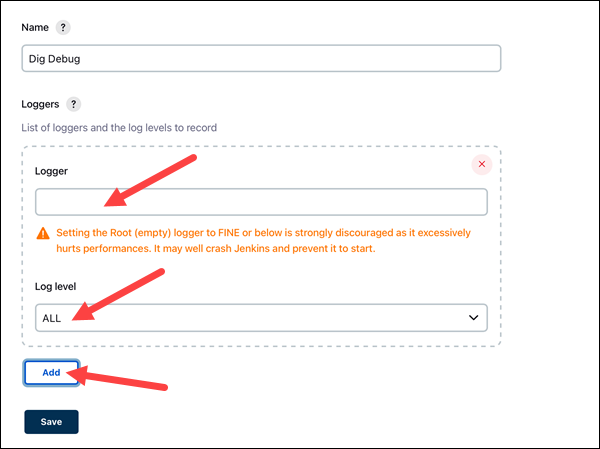
Note: Selecting the ALL or FINE logging level tends to produce substantial levels of output. To increase performance, consider removing the log recorder once you are finished with debugging.
4. For our example, we want to debug plugins related to Git. To do this, we will add new loggers monitoring these plugins and set the logging level to ALL.
5. Once you are done adding new loggers, click the Save button to save the new Jenkins log recorder.
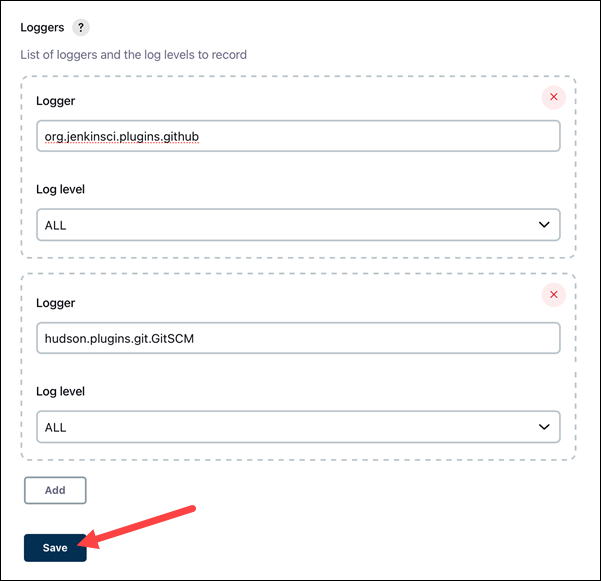
6. Once you've set up the new log recorder, open it by clicking its name in the Log Recorders section. With the log recorder open, click the Log records link on the left-hand side to review the new log records.
7.Jenkins workflow and write a script for this workflow?
Jenkins workflow is the old name for the Jenkins pipeline. Pipelines are the Jenkins job which a user-defined programmatically using the groovy script
pipeline {
    agent any
    stages {
        stage('Example') {
            steps {
                echo 'Hello World'
            }
        }
    }
}
Jenkins pipeline syntax generator
Jenkins provides a very powerful and valuable tool to get the syntax for your Jenkins pipeline. The syntax generator tool can be found under
http://<jenkins_url>/directive-generator/
pipeline {
    agent { label any }
    stages {
        stage('code') {
            steps {
                git url: 'https://github.com/devkrgoutam/node-todo-cicd.git',branch:'master'
            }
        }
        stage('build & test') {
            steps {
                sh 'docker build . -t node-todo-app'
            }
        }
        stage('deploy') {
            steps {
                sh 'docker-compose down && docker-compose up'
            }
        }
    }
}


pipeline {
    agent { label 'goutam-node-todo-cicd'}
    stages {
        stage('code') {
            steps {
                git url: 'https://github.com/devkrgoutam/node-todo-cicd.git',branch:'master'
            }
        }
        stage('build & test') {
            steps {
                sh 'docker build . -t node-todo-app'
            }
        }
        stage('deploy') {
            steps {
                sh 'docker-compose down && docker-compose up -d'
            }
        }
    }
8.How to create continuous deployment in Jenkins?
Step 1 − Go to the Jenkins dashboard and click on New Item. Choose a ‘Freestyle project’ and enter the project name as ‘QA’. Click on the Ok button to create the project.
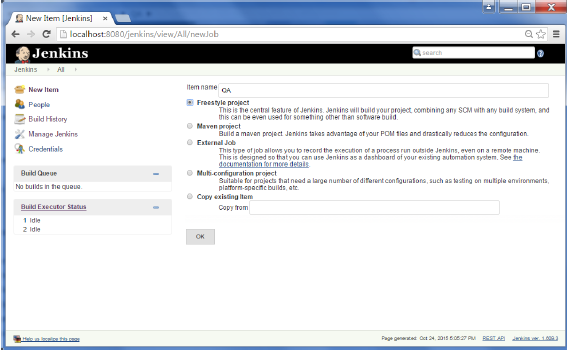
Step 2 − In this example, we are keeping it simple and just using this project to execute a test program for the Helloworld application.
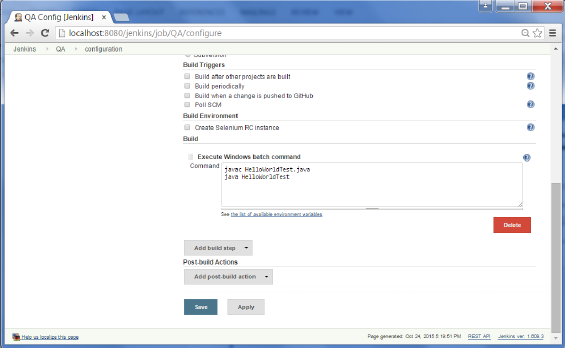
So our project QA is now setup. You can do a build to see if it builds properly.
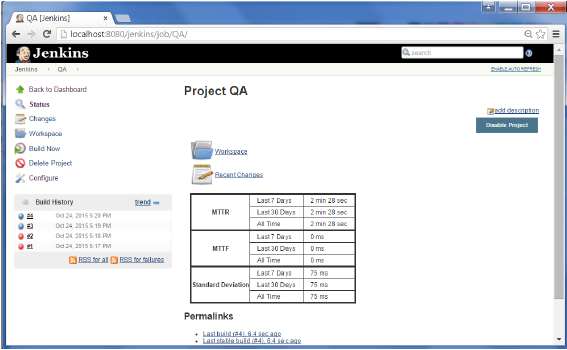
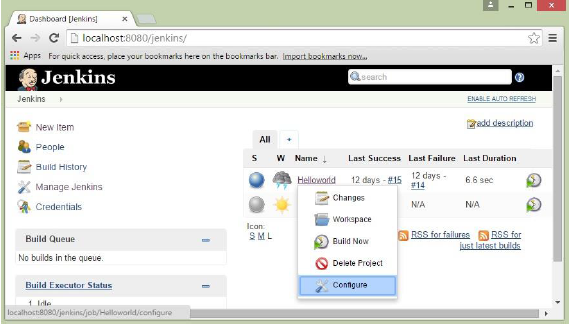
Step 3 − Now go to you Helloworld project and click on the Configure option
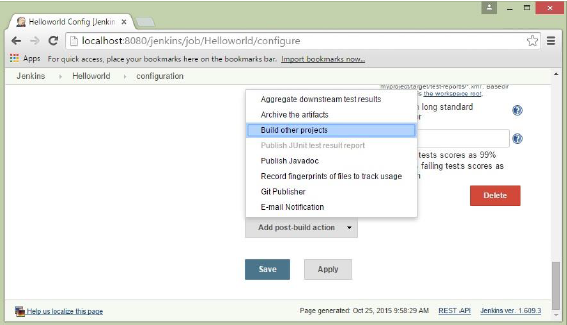
Step 4 − In the project configuration, choose the ‘Add post-build action’ and choose ‘Build other projects’
Step 5 − In the ‘Project to build’ section, enter QA as the project name to build. You can leave the option as default of ‘Trigger only if build is stable’. Click on the Save button.
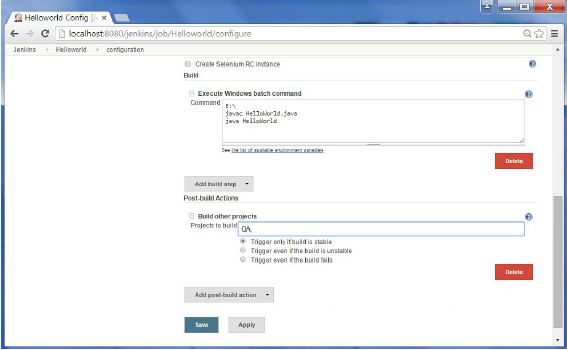
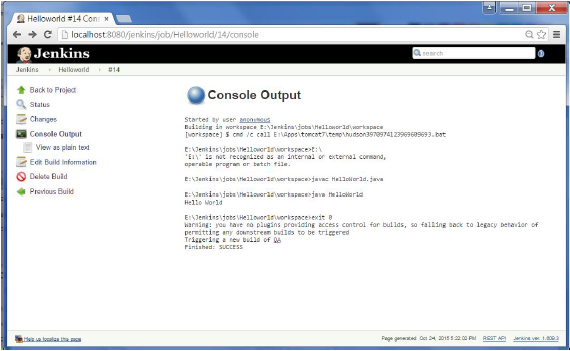
Step 6 − Build the Helloworld project. Now if you see the Console output, you will also see that after the Helloworld project is successfully built, the build of the QA project will also happen.
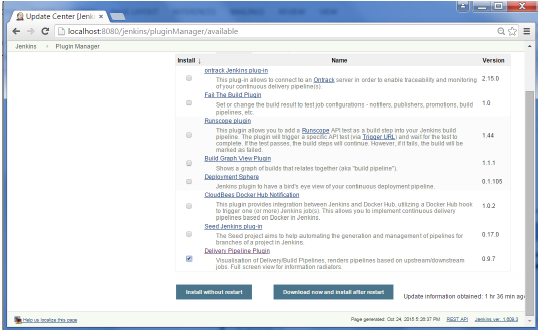
Step 7 − Let now install the Delivery pipeline plugin. Go to Manage Jenkins → Manage Plugin’s. In the available tab, search for ‘Delivery Pipeline Plugin’. Click On Install without Restart. Once done, restart the Jenkins instance.
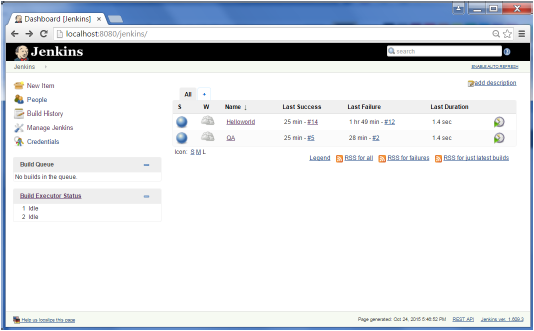
Step 8 − To see the Delivery pipeline in action, in the Jenkins Dashboard, click on the + symbol in the Tab next to the ‘All’ Tab.
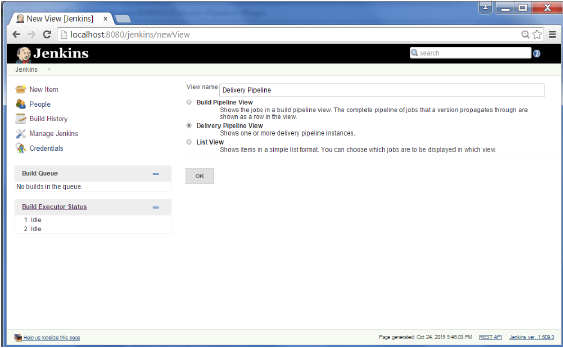
Step 9 − Enter any name for the View name and choose the option ‘Delivery Pipeline View’.
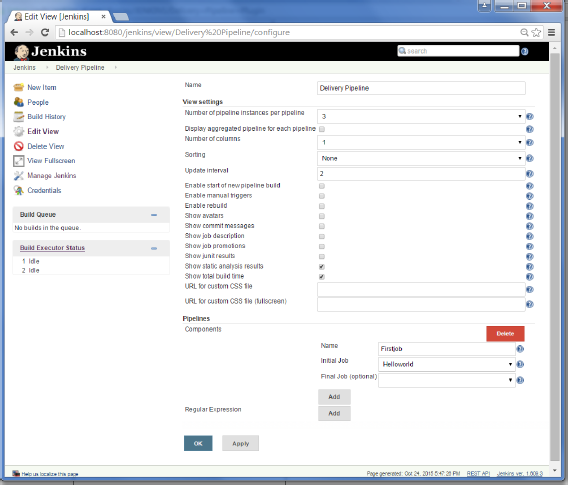
Step 10 − In the next screen, you can leave the default options. One can change the following settings −
Ensure the option ‘Show static analysis results’ is checked.
Ensure the option ‘Show total build time’ is checked.
For the Initial job – Enter the Helloworld project as the first job which should build.
Enter any name for the Pipeline
Click the OK button.
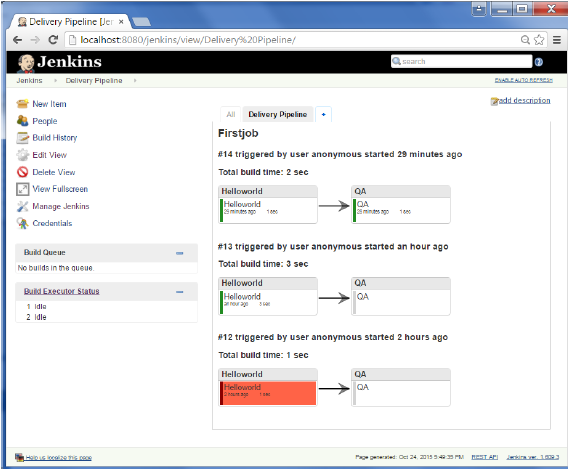
You will now see a great view of the entire delivery pipeline and you will be able to see the status of each project in the entire pipeline.
Another famous plugin is the build pipeline plugin. Let’s take a look at this.
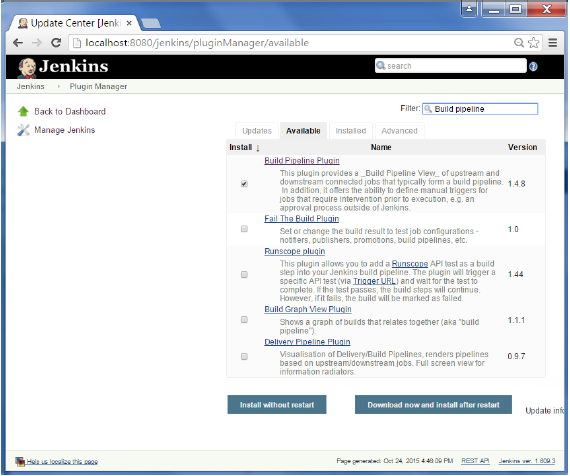
Step 1 − Go to Manage Jenkins → Manage Plugin’s. In the available tab, search for ‘Build Pipeline Plugin’. Click On Install without Restart. Once done, restart the Jenkins instance.
Step 2 − To see the Build pipeline in action, in the Jenkins Dashboard, click on the + symbol in the Tab next to the ‘All’ Tab.
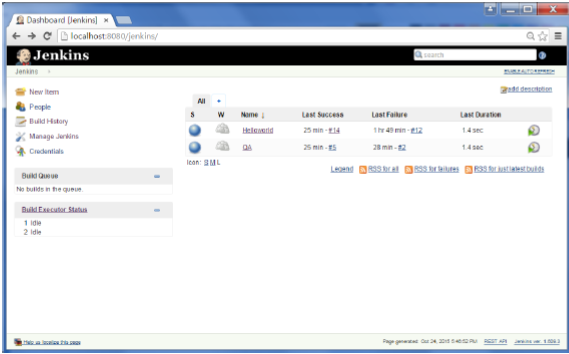
Step 3 − Enter any name for the View name and choose the option ‘Build Pipeline View’.
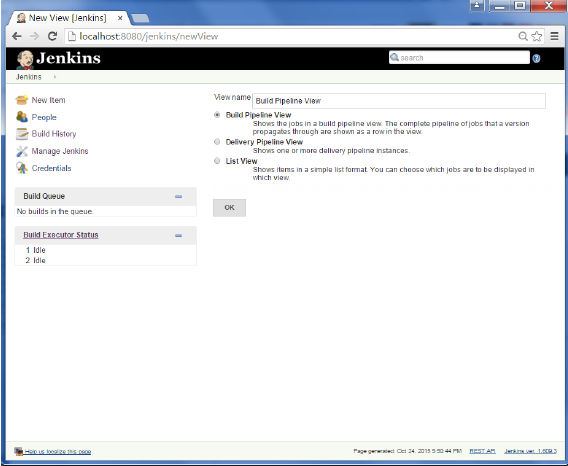
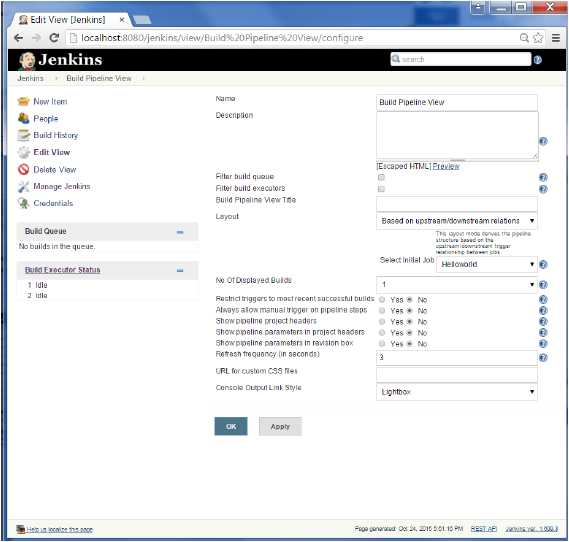
Step 4 − Accept the default settings, just in the Selected Initial job, ensure to enter the name of the Helloworld project. Click on the Ok button.
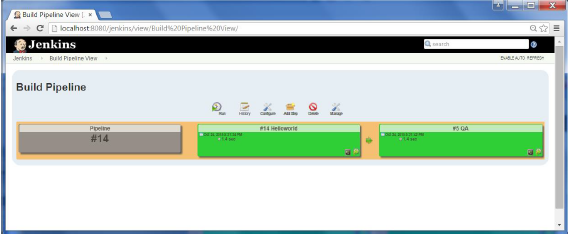
You will now see a great view of the entire delivery pipeline and you will be able to see the status of each project in the entire pipeline.
9.How to Set up a Build Job in Jenkins
Step 1: Create a New Freestyle Project. Click the New Item link on the left-hand side of the Jenkins dashboard. ...
Step 2: Add a Build Step. Scroll down to the Build section. ...
Step 3: Build the Project. Click the Build Now link on the left-hand side of the new project page.
10.Why we use pipeline in Jenkins?
Jenkins pipeline allows us to define a complete list of events that happen in the code lifecycle. Starting from the build, to testing and deployment. We can use a set of plugins that help in the implementation of certain processes as a continuous delivery pipeline.
11.Is Only Jenkins enough for automation?
Yes definitely Jenkins is good option for automation, because when you will start using Jenkins your deployment process becomes very smooth and fast.
12.How will you handle secrets?
Secrets can include:
User or auto-generated passwords
API and other application keys/credentials (including within containers)
SSH Keys
Database and other system-to-system passwords.
Private certificates for secure communication, transmitting and receiving of data (TLS, SSL etc.)
Private encryption keys for systems like PGP
RSA and other one-time password devices
Explain diff stages in CI-CD setup
The trigger.
Code checkout.
Compile the code.
Run unit tests.
Package the code.
Run acceptance tests.
Delivery or Deployment.
Name some of the plugins in Jenkin?
Git Plugin. Git is one of the most installed Jenkins add-ons available on its repository.
Kubernetes Plugin. Kubernetes is another widely used plugin in Jenkins.
Jira Plugin.
Docker Plugin.
Maven Integration Plugin.
Blue Ocean Plugin.
Amazon EC2 Plugin.
Pipeline Plugin.