Linux System Admin Project(Mail Server,DNS)
- Login via SSH
To start the SquirrelMail installation, login to your CentOS 9 VPS via SSH as user root
ssh root@IP_address -p PORT_NUMBER
VPS Name: test1.linuxreview.co.in
hostnamectl set-hostname test1.linuxreview.co.in
hostnamectl(to verify)
Username:goutam
Root Password:goutam@123
useradd goutam
passwd goutam ********
IP:103.234.116.177
SSH Port:22
Configure DNS Server
Mapped DNS Records:
test1.linuxreview.co.in. IN A 103.234.116.177
mail.test1.linuxreview.co.in. IN A 103.234.116.177
webmail.test1.linuxreview.co.in. IN A 103.234.116.177
test1.linuxreview.co.in. IN MX 10 test1.linuxreview.co.in.
Prerequisites
Install Bind Package
Configure Bind Service
Create Zone File
Start Bind Service
Verify DNS Resolution
Install Bind Package:
sudo yum update -y
sudo yum install bind bind-utils
Configure Bind Service:
sudo vi /etc/named.conf
Add the following line at the end of the file to define the local domain zone:
zone "linuxreview.co.in" IN {
    type master;
    file "/var/named/linuxreview.co.in";
    allow-update { none; };
};
Create Zone File:
After defining the local domain zone, you need to create the zone file. Run the following command to create the zone file:
sudo vi /var/named/linuxreview.co.in
Add the following lines to the file to define the domain name and IP address mapping:
$TTL 86400
@   IN  SOA ns1.linuxreview.co.in. admin.linuxreview.co.in. (
    2016042201  ;Serial
    3600        ;Refresh
    1800        ;Retry
    604800      ;Expire
    86400       ;Minimum TTL
)
@   IN  NS  ns1.linuxreview.co.in.
@   IN  A   103.234.116.177
ns1 IN  A   103.234.116.177
test1.linuxreview.co.in. IN A 103.234.116.177

mail.test1.linuxreview.co.in. IN A 103.234.116.177

webmail.test1.linuxreview.co.in. IN A 103.234.116.177

test1.linuxreview.co.in. IN MX 10 test1.linuxreview.co.in.
Start Bind Service:
After creating the zone file, start the Bind service by running the following command:
sudo systemctl start named
To enable the Bind service to start automatically at boot time, run the following command:
sudo systemctl enable named
Verify DNS Resolution:
To verify that your DNS server is working correctly, use the dig command to query the DNS server:
dig linuxreview.co.in
LAMP Setup
Setup Apache and host the website for test1.linuxreview.co.in on this server
Install Mariadb and PHP latest stable version on the server
Install Wordpress and PHPMyAdmin on the server
Enable Gzip compression on the web server and on the hosted WP website.
Check incoming and outgoing requests on the server logs.
Increase the no of workers and threads on the Apache server
Enable Letsencrypt SSL on this domain to prevent any SSL errors
Install and setup Apache with virtual host:

sudo yum install httpd
sudo systemctl start httpd
sudo systemctl enable httpd

sudo echo "ServerName localhost" >> /etc/httpd/conf/httpd.conf

sudo systemctl restart httpd
sudo mkdir -p /var/www/test1.linuxreview.co.in/public_html

sudo chown -R apache:apache /var/www/test1.linuxreview.co.in/public_html

sudo chmod -R 755 /var/www
sudo cp /etc/httpd/conf.d/vhost.conf /etc/httpd/conf.d/test1.linuxreview.co.in.conf
sudo vi /etc/httpd/conf.d/test1.linuxreview.co.in.conf
sudo systemctl reload httpd
Install MariaDB and PHP:
sudo yum install mariadb-server mariadb
sudo systemctl start mariadb
sudo systemctl enable mariadb
sudo mysql_secure_installation
sudo yum install php php-mysql php-gd php-mbstring
sudo systemctl restart httpd
Install WordPress and PHPMyAdmin:
Install WordPress and
PHPMyAdmin:

sudo yum install wget
cd /var/www/test1.linuxreview.co.in/public_html
sudo wget https://wordpress.org/latest.tar.gz
sudo tar -xvzf latest.tar.gz
sudo mv wordpress/* .
sudo rm -rf wordpress latest.tar.gz
sudo systemctl restart httpd
sudo yum install phpMyAdmin
sudo vi /etc/httpd/conf.d/phpMyAdmin.conf
sudo systemctl restart httpd
sudo mysql
sudo mysql -u root -p
CREATE USER 'ata'@'localhost' IDENTIFIED BY 'pa$$word';
GRANT ALL PRIVILEGES ON *.* TO 'ata'@'localhost' WITH GRANT OPTION;
exit
Navigate to http://your_domain_or_IP/phpmyadmin, where your_domain_or_IP
is the IP address or the DNS record pointing to your phpMyAdmin server.
On the Welcome to phpMyAdmin page that loads, type in the username and
password you created from the previous section and click Go.
Enable Gzip compression:
sudo vi /etc/httpd/conf.d/deflate.conf
sudo systemctl restart httpd


Check server logs for incoming/
outgoing requests:

sudo tail -f /var/log/httpd/access_log
sudo tail -f /var/log/httpd/error_log


Increase workers and threads on Apache:

sudo vi /etc/httpd/conf/httpd.conf
sudo systemctl restart httpd
Enable Letsencrypt SSL:
sudo yum install certbot python3-certbot-apache
sudo certbot --apache
POSTFIX for SMTP (Simple Mail Transfer Protocol): Used for Sending the Emails.
DOVECOT for POP3 (Post Office Protocol): Used for Receiving the Emails.
SQUIRRELMAIL for IMAP (Internet Message Access Protocol): Used for Front Web End Mail Client.
Server Configuration: RHEL 7 IP Address: 103.234.116.177
- Set the hostname in the machine.
hostnamectl set-hostname test1.linuxreview.co.in
Add hostname entries in /etc/hosts file as shown below:
vim /etc/hosts
Add the following 103.234.116.177 test1.linuxreview.co.in test1
- Disable or make permissive the SELINUX
setenforce 0
getenforce
- Install EPEL Repository:
wget https://dl.fedoraproject.org/pub/epel...
rpm -ivh epel-release-latest-7.noarch.rpm
yum install -y epel-release
- Allow the Apache default port 80 through your firewall/router:
firewall-cmd --permanent --add-port=80/tcp
Reload firewall using command:
firewall-cmd --reload
- Install the Postfix Package.
yum install postfix -y
- Configuring PostFix
vim /etc/postfix/main.cf
Line no 77 - Uncomment and set your mail server FQDN
myhostname = test1.linuxreview.co.in
Line 85 - Uncomment and Set domain name
mydomain = linuxreview.co.in
Line 101 - Uncomment
myorigin = $mydomain
Line 115 - Uncomment and Set ipv4
inet_interfaces = all
Line 121 - Change to all
inet_protocols = all
Line 166 - Comment
#mydestination = $myhostname, localhost.$mydomain, localhost,
Line 167 - Uncomment
mydestination = $myhostname, localhost.$mydomain, localhost, $mydomain
Line 266 - Uncomment and add IP range
mynetworks = 103.234.116.0/24, 127.0.0.0/8
Line 421 - Uncomment
home_mailbox = Maildir/
Save and exit the file.
Start/restart Postfix service now:
systemctl restart postfix
systemctl enable postfix
systemctl status postfix
- Test the Postfix Server:
Add the user account.
useradd goutam
passwd goutam    (Configuring Password)
Install Telnet Package
yum install -y telnet
Check telnet
telnet localhost smtp

ehlo localhost     (Type the commands)
mail from:goutam
rcpt to:goutamkumar
50 5.1.1 <goutamkumar>: Recipient address rejected: User unknown in local recipient table
(It means user is not created,create the user and try again)
data
welcome to Postfix Mail Server(mentioned their below)
.   (write dot)
250 2.0.0 Ok: queued as 4FA2022DDD25
quit
221 2.0.0 Bye
Connection closed by foreign host.
.
quit
ll /home/goutamkumar/Maildir/new/ (verifying the same)
total 4
-rw-------. 1 goutamkumar goutamkumar 455 Sep 23 11:45 1695449745.Vfd00I22f4f98M693658.test1.linuxreview.co.in
Open the file with name using cat.
- Install Dovecot Package
yum install -y dovecot
Configure Dovecot vim /etc/dovecot/dovecot.conf
Line 24 - umcomment
protocols = imap pop3 lmtp (after that save this)
Edit file /etc/dovecot/conf.d/10-mail.conf file
vim /etc/dovecot/conf.d/10-mail.conf
Line 24 - uncomment
mail_location = maildir:~/Maildir (save this)
Edit /etc/dovecot/conf.d/10-auth.conf
vim /etc/dovecot/conf.d/10-auth.conf
And make the changes as shown below:
line 10 - uncomment
disable_plaintext_auth = yes
Line 100 - Add the word: "login"
auth_mechanisms = plain login (save)
Edit file /etc/dovecot/conf.d/10-master.conf,
vim /etc/dovecot/conf.d/10-master.conf
Make changes as shown below:
Line 91, 92 - Uncomment and add "postfix"
#mode = 0600 user = postfix group = postfix [...]
Start Dovecot service:
systemctl start dovecot
systemctl enable dovecot
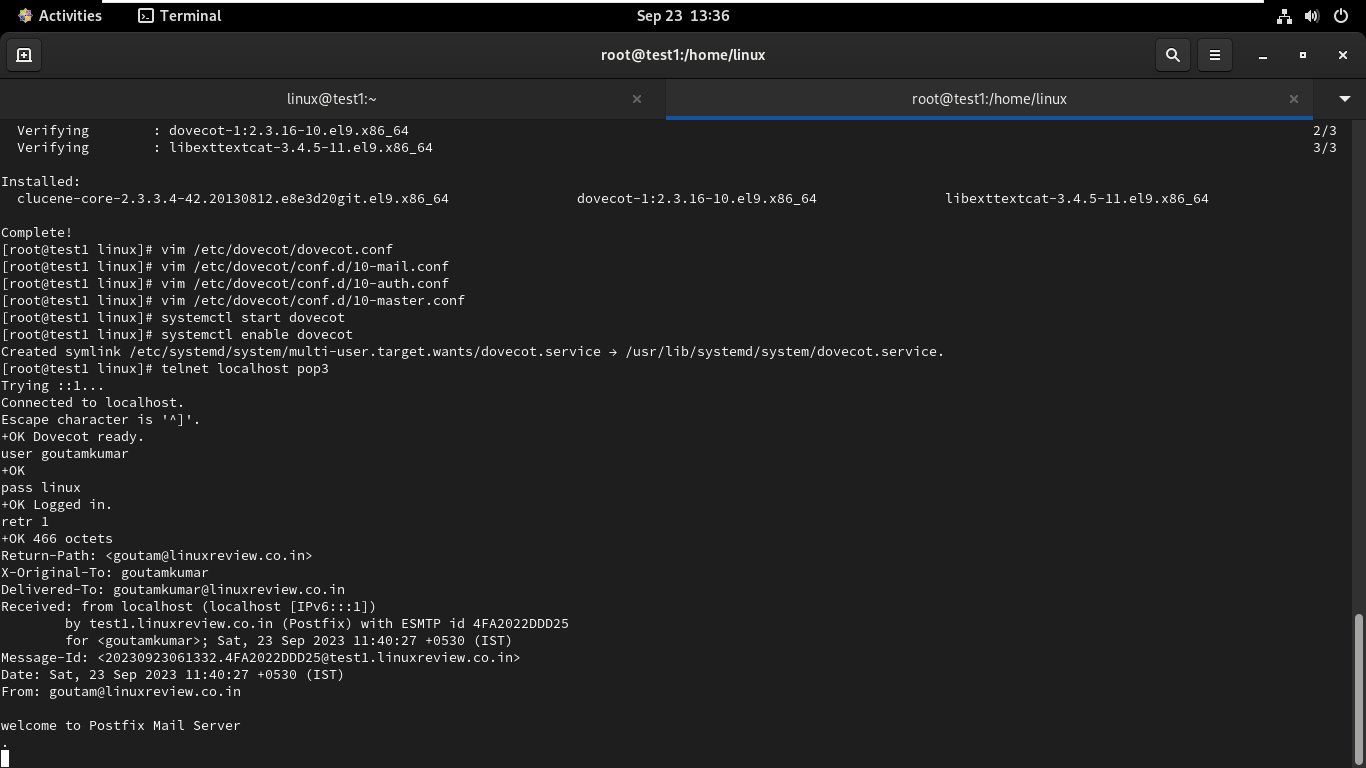
Testing Dovecot
telnet localhost pop3
user goutamkumar
pass linux
retr 1 (retrive the recipient)
.
quit
quit
- Install Squirrel mail Package
yum install squirrelmail
Or Follow this process(if the squirrelmail not found then follow this process)
Download SquirrelMail from here on the squirrelmail site.(zip file)
Open Terminal and navigate to Downloads:
cd DownloadsUnzip downloaded zip file.
 unzip squirrelmail-webmail-1.4.22.zip
 or
 tar -xvf squirrelmail-webmail-1.4.22.tar.gz
Run configure file:
./configure
Or
Configuring Squirrel-Mail
cd /usr/share/squirrelmail/config/
./conf.pl
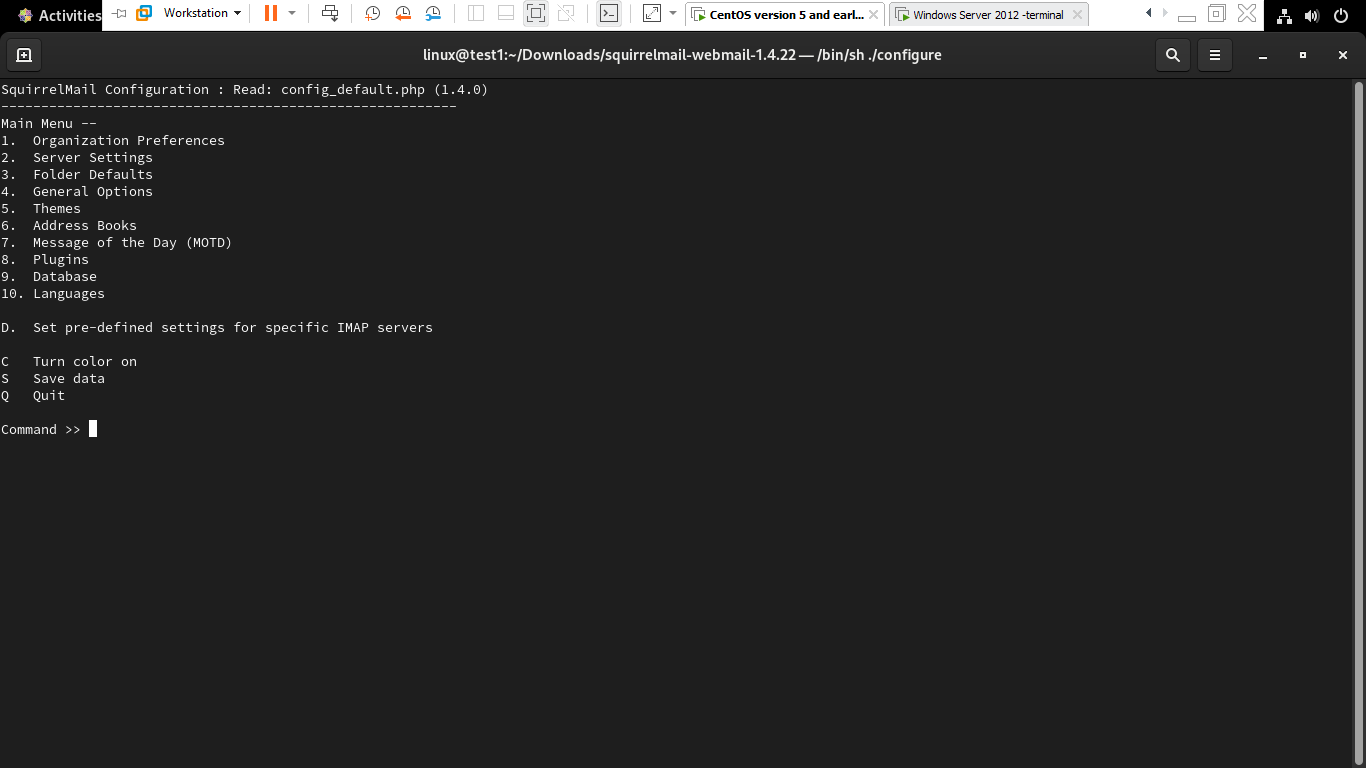
Enter 1 Enter 1 and change the organization Name Press S Press R for previous menu
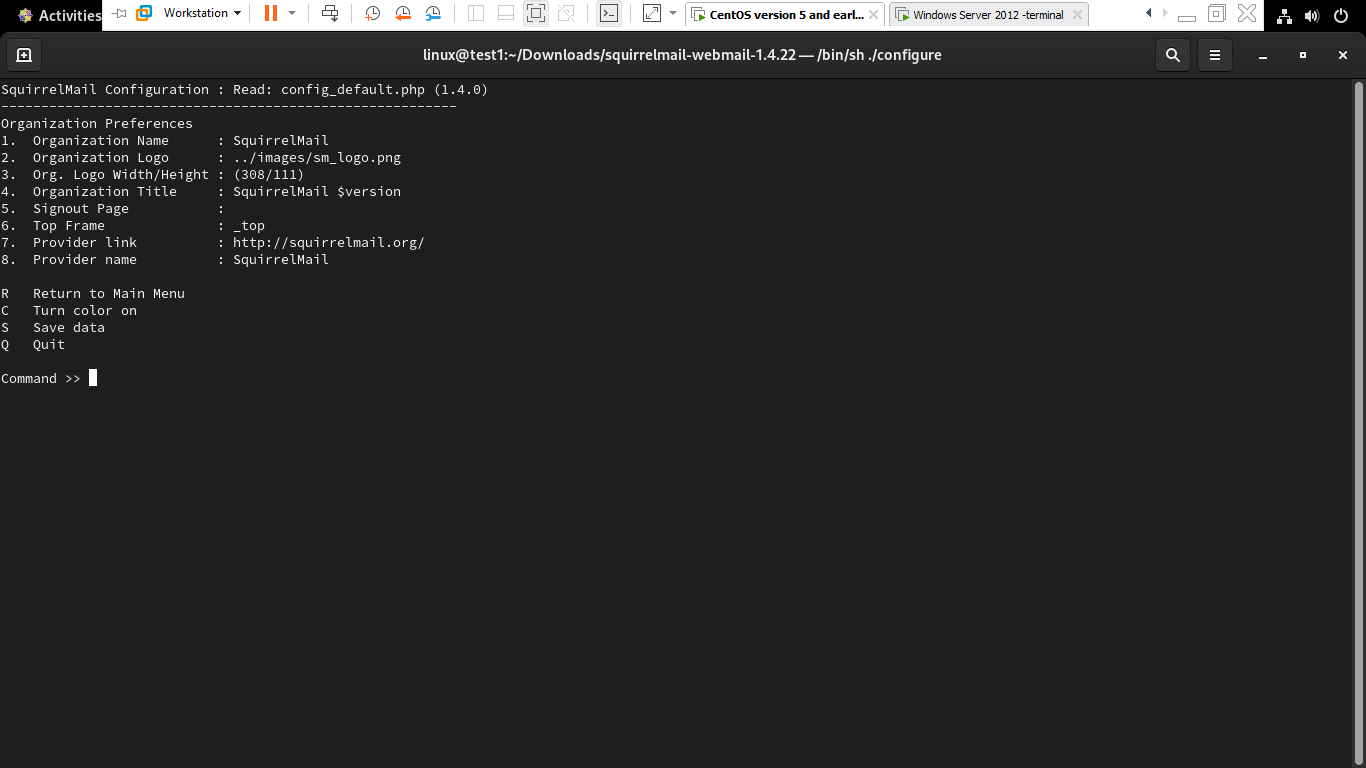
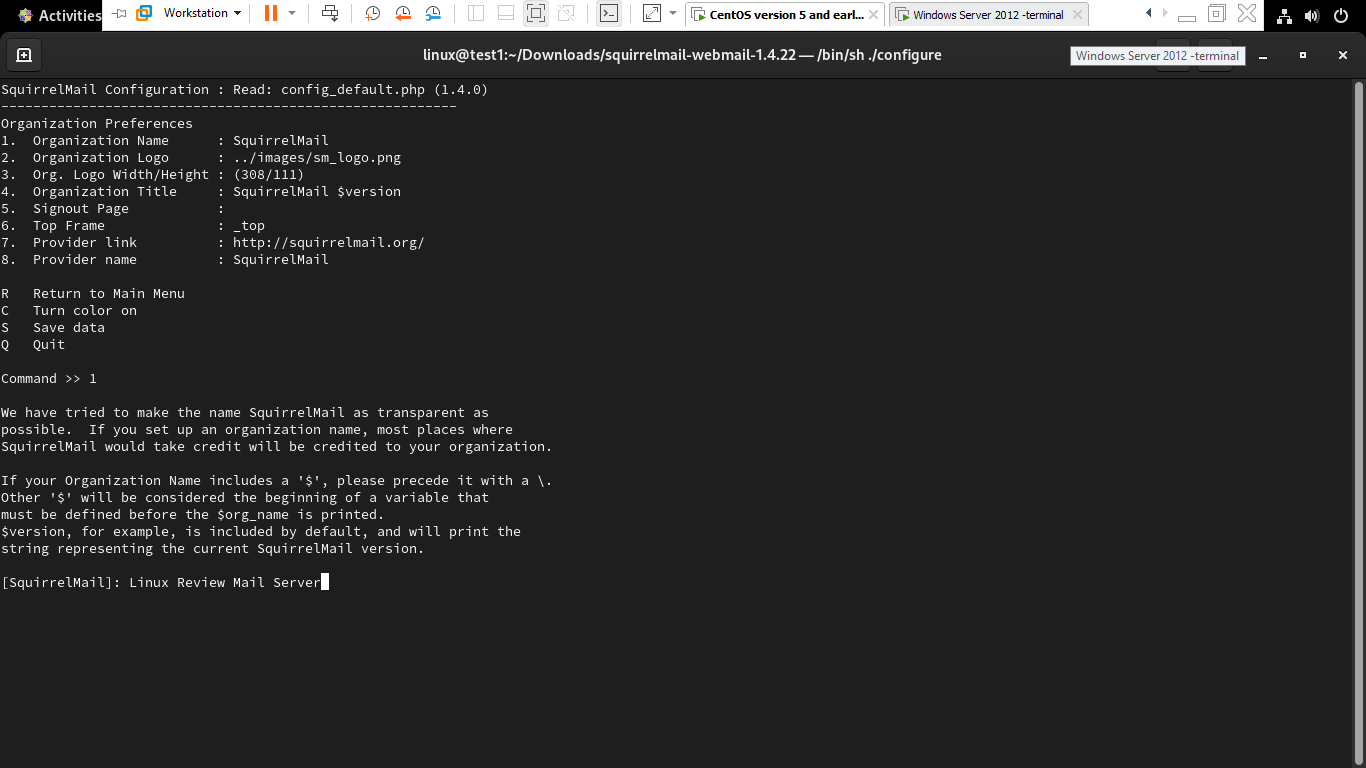
Type S and Press Q for quit
Type R return to main menu
Enter 2 for Server settings
Press 1 and type: test1.linuxreview.co.in (Name of Domain)
Press 3 (SMTP)
Press 2 for switching from Send Mail to SMTP
Type S and Press Q for quit
- Create a squirrelmail vhost in apache config file:
vim /etc/httpd/conf/httpd.conf
Go to the bottom and ,Enter the following:
Alias /webmail /usr/share/squirrelmail
<Directory /usr/share/squirrelmail>
Options Indexes FollowSymLinks

RewriteEngine On

AllowOverride All

DirectoryIndex index.php

Order allow,deny

Allow from all

</Directory>
systemctl restart httpd
systemctl enable httpd
Enter the following command:
setsebool httpd_can_network_connect=1(To enable the link opwn in browser)
Open Web Browser and type in address bar the following. And Use User Credentials to Login. http://103.234.116.177/webmail
Your Dovecot Server is working.