VCenter Server Appliance
VMware vCenter Server is the centralized monitoring and resource management software for VMware vSphere virtual infrastructure.
VMware vCenter Server performs a number of tasks:
Including resource provisioning and allocation
Performance monitoring
Workflow automation and user privilege management.
It enables a vSphere administrator to manage multiple ESX and ESXi servers and virtual machines (VMs) through a single console.
It is use to manage Multiple Cluster
Multiple ESXI
Multiple Data Storage.
Multiple VMs.
There are two way to install VCenter:
1.vCentre Server on Windows
2.vCenter Server Appliance
Requirements:
Ram:8GB
2 Core Cpu
80GB
Domain(e.g. myprojects.com
ON Windows
**Create Data Source
**
Before beginning if you intend to use vCenter Server with an external SQL database be sure to install the SQL Server Native Client v10 or v11.
You must also configure a 64-bit ODBC data source for external databases. ODBC Data Source Administrator can be accessed via Control Panel > Administrative Tools. Click System DNS, Add and input the details for the external database, test the data source before continuing. If you are using the internal Postgres database then the System DSN is added automatically during installation.

Installation
Download the VMware vCenter Server and Modules for Windows ISO from VMware downloads: v6.5.0 | v6.5.0 U1.
Mount the ISO and right click autorun.exe, select Run as administrator. The VMware vCenter Installer will open. Ensure vCenter Server for Windows is selected and click Install.
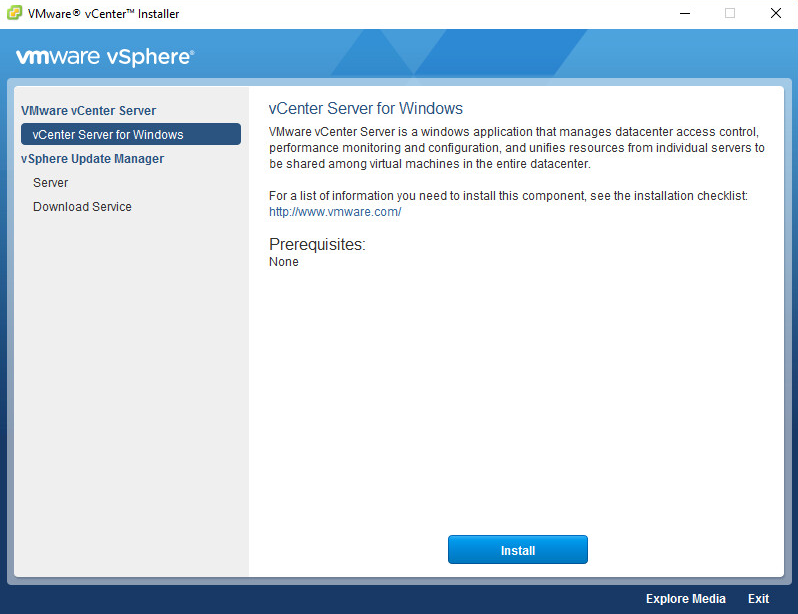
The vCenter Server 6.5 Installer will open in a separate window, click Next.

Accept the end user license agreement and click Next.

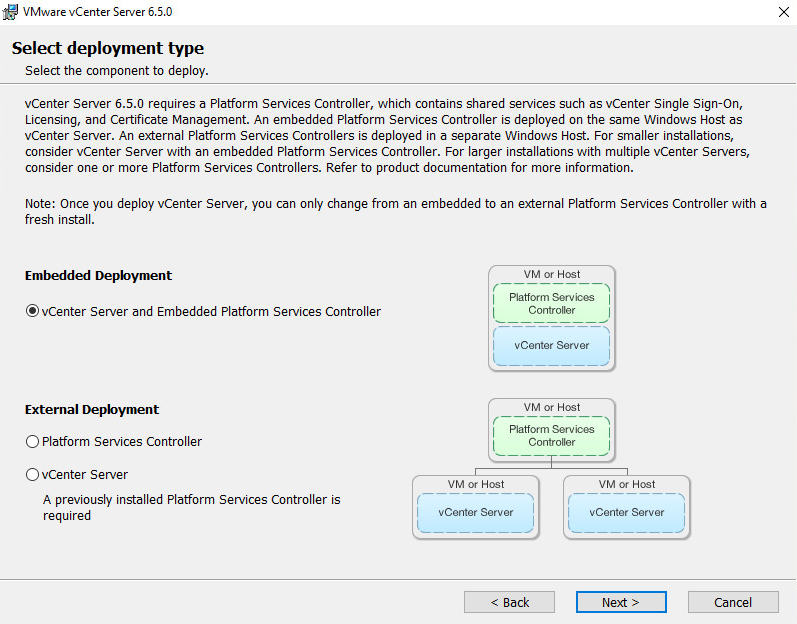
In this guide we will be using an embedded deployment model. If you are using an external deployment model the PSC component must be installed first before the vCenter. Select the deployment type and click Next. If the Windows server does not have sufficient resources allocated the installer will error at this stage.
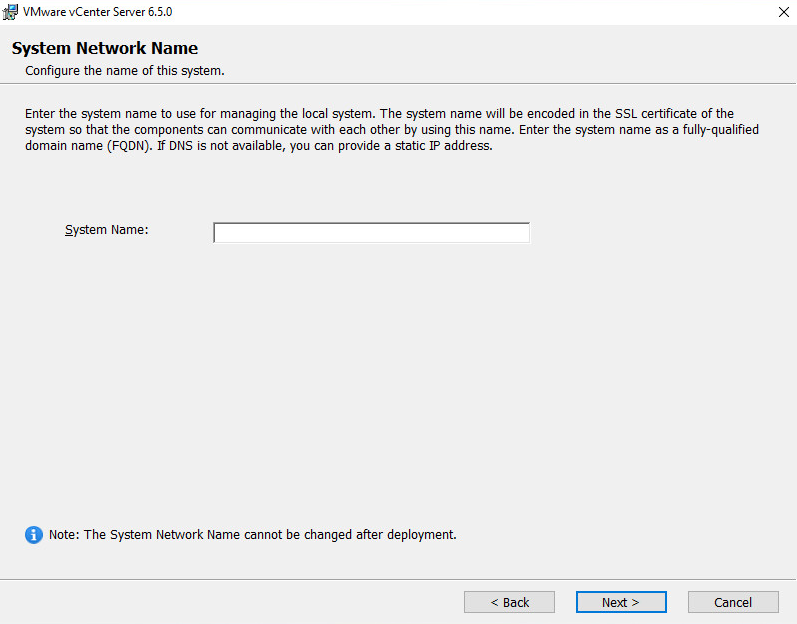
Enter the FQDN in the System Name field and click Next.
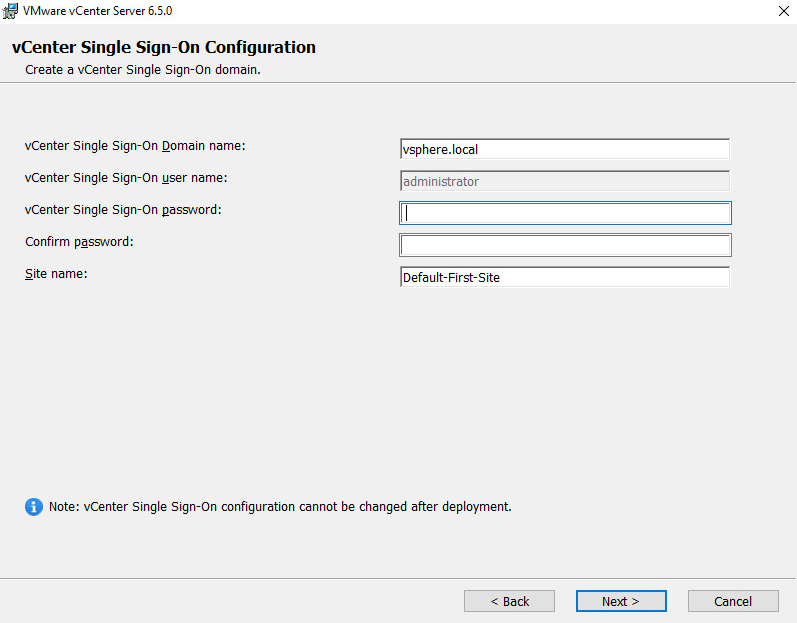
Create a new Single Sign-On domain, or join the vCenter to an existing SSO domain. If you are creating a new SSO domain give this a meaningful name, (not the same as your Active Directory name) the default is vsphere.local. Configure a password for the SSO administrator account and a vCenter specific site name, click Next.
Select whether to run vCenter services as the local system account or enter details of a service account and click Next. Ensure the account running vCenter services has been granted permissions as per the other considerations section of this guide.

Select an embedded Postgre database or point the installer to the DSN for an external database, click Next.

Accept the default port configuration and click Next.
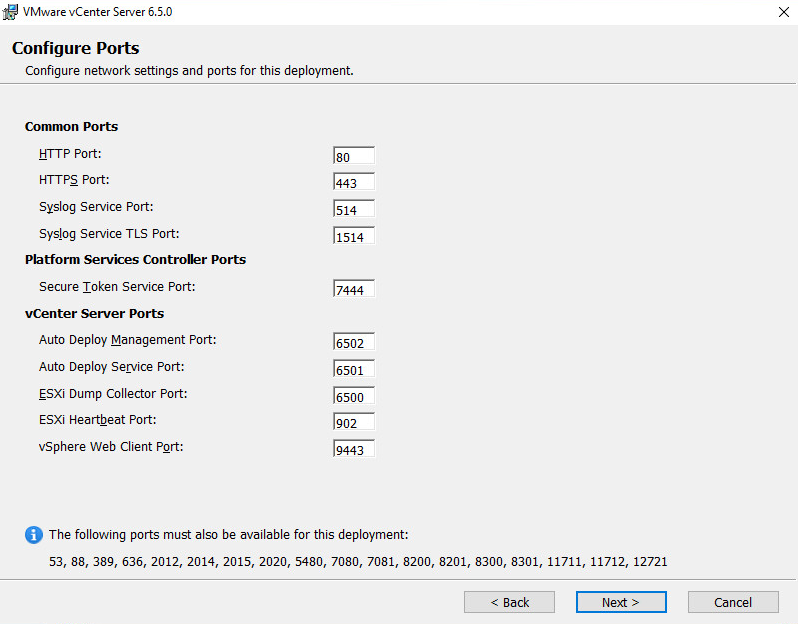
Select the directory to install vCenter services and click Next.

Tick or untick the VMware Customer Experience Improvement Program as appropriate and click Next.

Check the configuration on the review page and click Install to begin the installation process.

Once the installation has completed click Finish.

Post-Installation
Connect to the vCenter post install using the IP or FQDN of the vCenter. Access vSphere by clicking either the vSphere Web Client (Flash) or the vSphere Client (HTML5). Connect to the vSphere Web Client to manage your system, the thick client (Windows) is no longer supported.
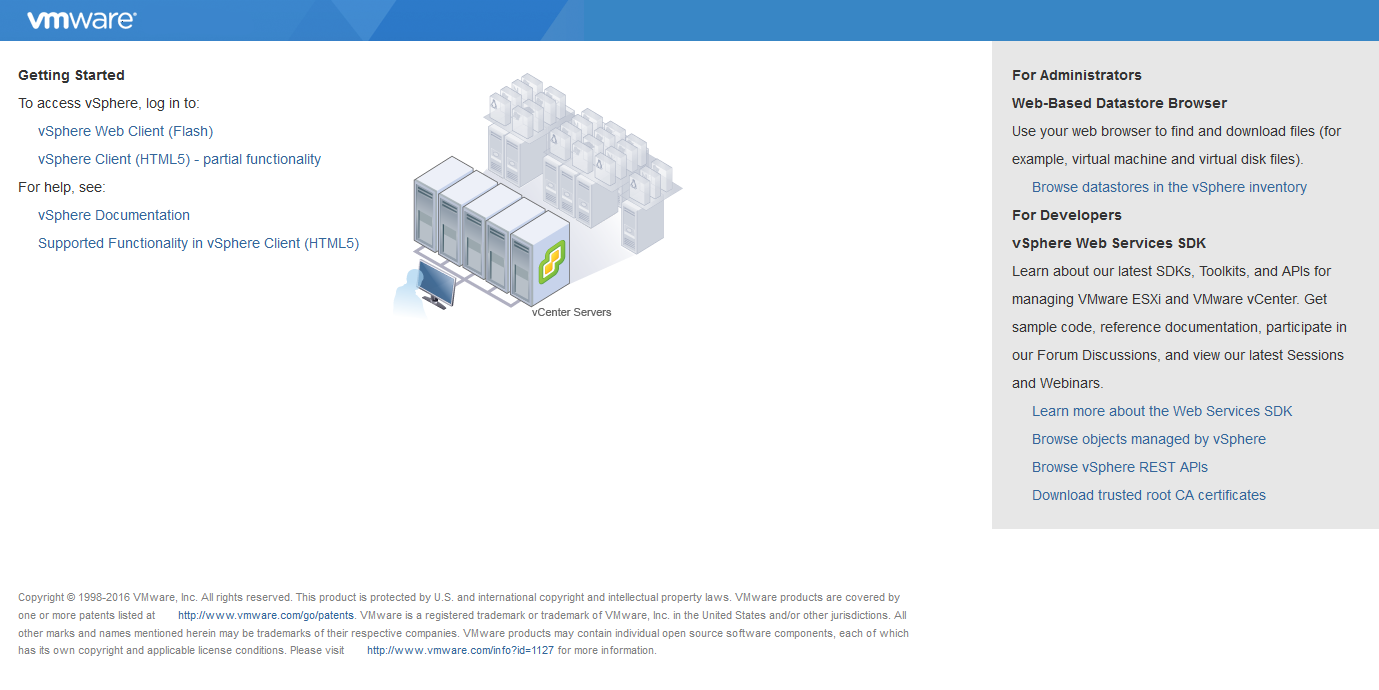
Log in to the vSphere Web Client using the SSO administrator login. Verify the installed version is correct under the Summary tab when selecting the vCenter, you can also go to Help > About.
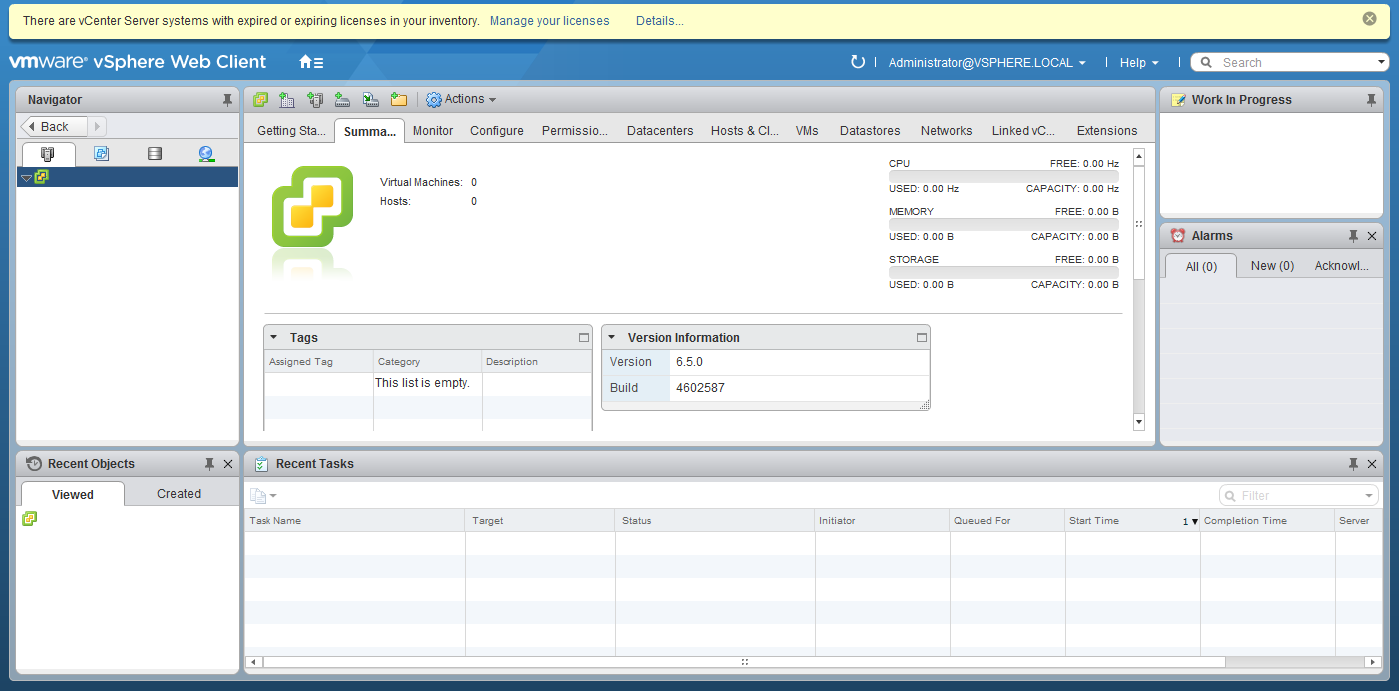
You must apply a new vCenter license key within 60 days. From the Hosts and Clusters view select the vCenter Server. Click Actions and Assign License. Select a license or use the green plus button to add a new license and click Ok.
You can obtain a 60 day trial license for vCenter Server here. If you have purchased vCenter Server then log into your licensing portal here. If the license key does not appear then check with your VMware account manager.
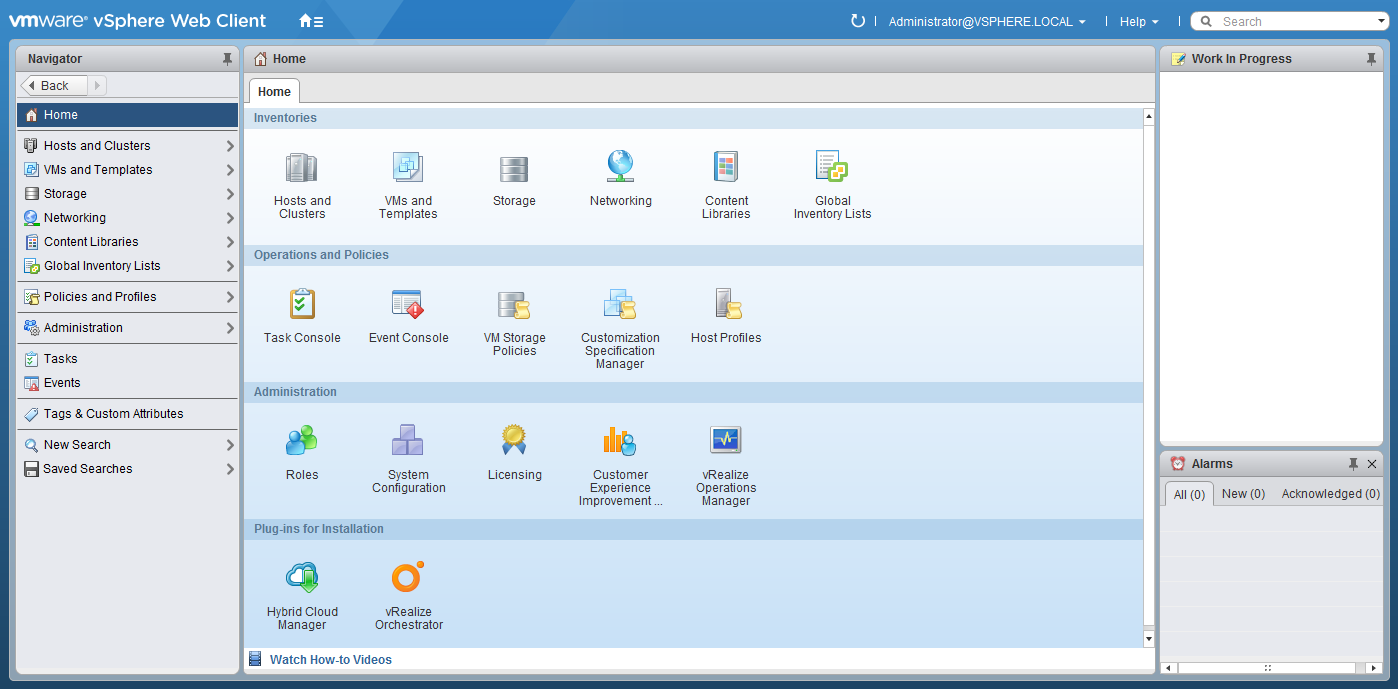
If you have an Active Directory domain then vCenter can use this as a source for permissions and sign on credentials. First join the vCenter to the domain; from the home page click System Configuration, Nodes, and select the vCenter server. In the Active Directory section of the Manage tab click Join, input your AD details and click Ok. Reboot the appliance either right clicking the vCenter server under Nodes and selecting Reboot.
When the vCenter server comes back online we can add AD as an identity source; from the home page click Administration, under Single Sign-On select Configuration. Ensure the Identity Sources tab is open and click the green plus symbol to add a source. Fill in the Active Directory details for your domain and click Ok.

You can now add permissions to vCenter objects such as datacentres, clusters, folders, individual virtual machines, etc. for Active Directory users and groups by selecting the object and clicking Permissions under the Manage tab. To learn more about how vSphere permissions work review the vSphere permissions documentation section.
Step to how to install VCenter Server Appliance:
Mount the ISO on your computer. The VCSA installer is compatible with Mac, Linux, and Windows.
Browse to the corresponding directory for your operating system, e.g.,
\vcsa-ui-installer\win32: right-click Installer and select Run as administrator.
As we are installing a new instance, click Install.

The installation is split into two stages, and we will begin with deploying the appliance. Click Next to start.

Read and accept the EULA, and then click Next to continue.

Select the ESXi host on which to install the VCSA as a guest. This must be a host that runs ESXi 6.5 or later. NVIDIA recommends that the vCenter server (Windows or appliance-based) run on a separate management cluster from the one designated for VDI workloads. Enter the IP address or fully qualified domain name (FQDN) of the chosen host, its root username, and password; then click Next.

If your desktop can reach the host, you should see a certificate warning as it connects. This warning is due to the use of a self-signed certificate. If you are using a signed certificate, you will not see this warning. Click Yes to continue.

The credentials are validated.

When prompted after a successful connection, provide a VM name for the vCenter Server 7, type the passwords in the Set Root password field, and enter the root password again, and click Next.

Select a deployment size appropriate to the number of hosts and virtual machines that vCenter Server will manage, then click Next.

Select the datastore where the VCSA will be deployed, select thin provisioning if required, and click Next.

The installer displays the Configure network settings. Before you configure these settings, choose an appropriate static IP address, and enter it into local DNS (e.g., on the Domain Controller). Once you can resolve the address, enter the IP address hostname on the network setting page, then scroll down and enter the remaining items. When all desired settings are complete, select Next.

Review the settings before starting the vCenter Server deployment and click Finish to start the installation.

The vCenter Server will start deploying on the specified target ESXi host. Installation progress can be viewed on the screen.

With the VCSA now deployed, move on to stage 2 by clicking Continue.

Select Next to proceed with Stage 2, setting up the vCenter Server.

Configure the NTP server by selecting the Time synchronization mode and Enabling the SSH access, then click Next.

Enter a unique SSO domain name, configure a password for the SSO administrator, click Next.
Note
The default SSO domain name is vSphere.local. The SSO domain name should not be the same as your Active Directory Domain.

Select or deselect the customer experience improvement program box and click Next.

Review the details on the summary page and click Finish to finalize the setup.

The installer displays a warning that you cannot pause or stop the install once you start it. Click Ok to acknowledge the warning and start the install.

When the install process is complete, click Close to exit the installer and entire Stage 2 of the VCSA setup.

Post Installation
This section describes the post-install and configuration of the vCenter Server VCSA.
Adding Licenses to the vCenter Server
Use the following procedure to configure vCenter:
Connect to the vCenter post install using the IP or FQDN of the vCenter. Access vSphere by selecting Launch vSphere Client (HTML5).

The VMware Single Single-On page displays. Enter the username and password that you specified during installation, then click the Login button.

The VMware vSphere Web Client page displays.

You must apply for a new vCenter license key within 60 days. If you have purchased vCenter Server, log in to your licensing portal. Select your license and log in to the vSphere Web Client using the SSO administrator login. (If the license key does not appear, then check with your VMware account manager.)
Click the Menu drop-down, then click Administration. Select Licenses from the left-hand menu, then select the Licenses tab. Click Add New Licenses to open the New Licenses dialog.

Enter the vCenter Server Standard license key provided at the vSphere Licensing Portal.

Enter a unique name for the license in the License Name field and then click Next.

Review your selections, then click Finish to close the Enter New License dialog and return to the VMware vSphere Web Client page.

Adding a Host
Use the following procedure to add a host in vCenter.
Select the Home icon (house) on the VMware vSphere Web Client page.
Select Hosts and Clusters.
From the Actions drop-down list, select New Datacenter.

Enter a name for the datacenter in the Datacenter Name field and click Ok.

The new datacenter is visible in the left panel of the vSphere Web Client. Click the actions drop-down and select Add a Host.

Enter the hostname or IP address of the vSphere host and click Next.

Enter the administrator account credentials in the Username and Password fields and click Next.

Click Yes to replace the host certificate.

The Host summary dialog displays. Review the settings and click Next to proceed.
The Assign license dialog displays. Confirm the license selection and click Next.
The Lockdown mode dialog displays. Accept the default setting (Disabled) and click Next.
The VM location dialog displays. Select a cluster or accept the default option and click Next to continue.
The Ready to Complete dialog displays. Click Finish to complete adding the new host.

The new host is now visible in the left panel when you click the datacenter name.

Setting the NTP Service on a Host
Click a host object in the menu on the left, click Configure > System > Time Configuration > Network Time Protocol > Edit.

Check the Enable box and enter a valid time server and click OK.

Note
Use a Public NTP Server, a recommended choice is pool.ntp.org
Setting a vCenter Appliance to Auto-Start
Use the following procedure to set a vCenter Appliance to start automatically:
In the vSphere Web Client, select the host then select Configure > Virtual Machines > VM Startup/Shutdown. Click the Edit button.

The Edit VM Startup and Shutdown Configuration window displays. Select the vCenter Server, then click the Move To button to move that virtual machine up to the Automatic section of the appliance table. Then click the Edit button.

Select and set the following options:
Set Startup Settings to Use specified settings
Select Continue immediately if VMware Tools starts
Set Startup Delay to 0
Set Shutdown Settings to Use specified settings
Set Shutdown Delay to 0
Set Perform shutdown action to Guest shutdown

Click Ok to apply the configuration settings.
Note
The vCenter Web Client may not reflect these configuration changes immediately. Either click the Refresh icon or a different configuration group and return to the current setting.
Mounting an NFS ISO Data Store
Use the following procedure to mount an NFS ISO data store.
In the main vSphere Web Client window, select Hosts and Clusters and select the host.
Select Storage -> New Datastore from the Actions drop-down menu. The New Datastore window displays with the Type tab selected.

Select NFS and click Next to proceed.
The Select NFS version tab displays.
Select the correct NFS version and click Next to proceed.
The Name and configuration tab displays.
Enter the NFS exported folder path and the NFS server address in the Folder and Address fields.
- Because the data store is an ISO data store, consider mounting it as read-only by checking the Mount NFS as a read-only checkbox.
Click Next to proceed. The Host accessibility tab displays.
Select the host that will use the new data store.
Select Next to proceed. The Ready to complete tab displays.

Review the settings.
Click Finish to complete adding the NFS ISO data store. This data store is now accessible as an installation source for virtual machine CD drives.