Table of contents
- Installation:
- Linux
- uname
- Syntax
- Options
- Return Value
- Displaying Docker Images
- Downloading Docker Images
- Syntax
- Removing Docker Images
- Syntax
- Return Value
- Example
- docker inspect
- Syntax
- Options
- Running a Container
- Listing of Containers
- docker history
- Syntax
- docker top
- Syntax
- docker stop
- Syntax
- docker rm
- Syntax
- docker stats
- Syntax
- docker attach
- Syntax
- docker pause
- Syntax
- docker unpause
- Syntax
- docker kill
- Syntax
- Docker – Container Lifecycle
- service docker stop
- Syntax
- docker build
- Syntax
- Options
- docker tag
- Syntax
- Options
- Return Value
- Example
- Output
- docker push
- Syntax
- Options
- Return Value
- Example
- Output
- docker inspect
- Syntax
- Options
- Return Value
- Example
- Output
- Docker - Private Registries
- Docker - Building a Web Server Docker File
- Docker - Container Linking
- Docker - Storage
- Docker - Networking
Docker is a software platform that allows you to build, test, and deploy applications quickly. Docker packages software into standardized units called containers that have everything the software needs to run including libraries, system tools, code, and runtime. Using Docker, you can quickly deploy and scale applications into any environment and know your code will run.
Docker Engine − It is used for building Docker images and creating Docker containers.
Docker Hub − This is the registry which is used to host various Docker images.
Docker Compose − This is used to define applications using multiple Docker containers.
Installation:
Linux
uname
This method returns the system information about the Linux system.
Syntax
uname -aOptions
a − This is used to ensure that the system information is returned.
Return Value
This method returns the following information on the Linux system −
kernel name
node name
kernel release
kernel version
machine
processor
hardware platform
operating system
sudo apt-get update -y
Step 3 − The next step is to install the necessary certificates that will be required to work with the Docker site later on to download the necessary Docker packages.
sudo apt-get install apt-transport-https ca-certificatesapt-get update command
sudo apt-get install docker.io
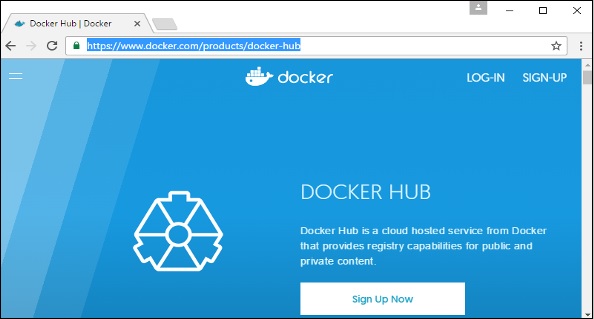
Docker Hub is a registry service on the cloud that allows you to download Docker images that are built by other communities. You can also upload your own Docker built images to Docker hub. In this chapter, we will see how to download and the use the Jenkins Docker image from Docker hub.
The official site for Docker hub is − https://www.docker.com/community-edition#/add_ons
Step 1 − First you need to do a simple sign-up on Docker hub.
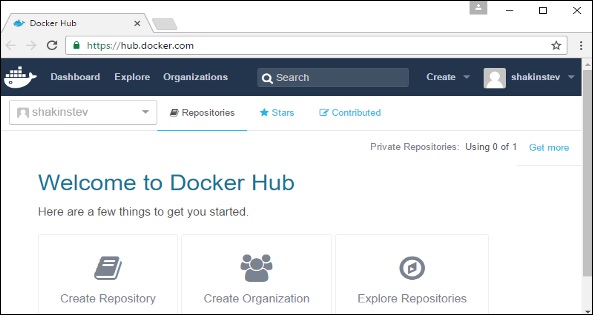
Step 2 − Once you have signed up, you will be logged into Docker Hub.
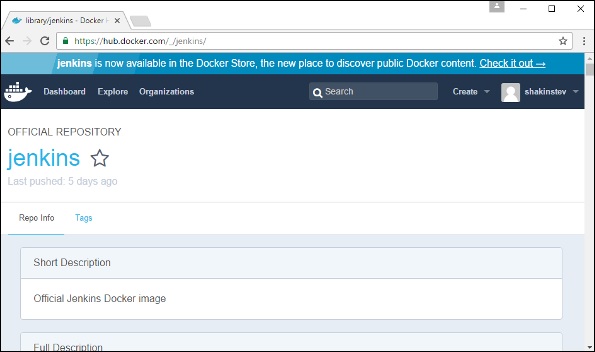
Step 3 − Next, let’s browse and find the Jenkins image.
Step 4 − If you scroll down on the same page, you can see the Docker pull command. This will be used to download the Jenkins image onto the local Ubuntu server.
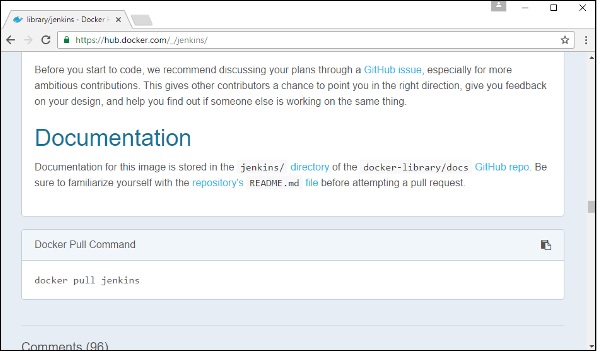
Step 5 − Now, go to the Ubuntu server and run the following command −
sudo docker pull jenkins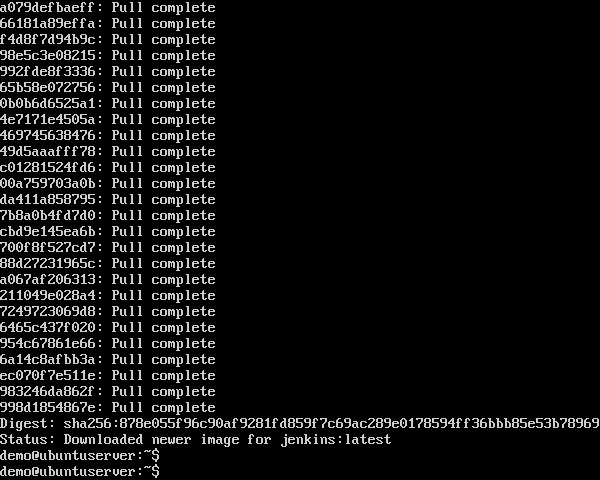
To run Jenkins, you need to run the following command −
sudo docker run -p 8080:8080 -p 50000:50000 jenkinsNote the following points about the above sudo command −
We are using the sudo command to ensure it runs with root access.
Here, jenkins is the name of the image we want to download from Docker hub and install on our Ubuntu machine.
-p is used to map the port number of the internal Docker image to our main Ubuntu server so that we can access the container accordingly.
docker run hello-worldThe Docker command is specific and tells the Docker program on the Operating System that something needs to be done.
The run command is used to mention that we want to create an instance of an image, which is then called a container.
Finally, "hello-world" represents the image from which the container is made.
Now let’s look at how we can use the CentOS image available in Docker Hub to run CentOS on our Ubuntu machine. We can do this by executing the following command on our Ubuntu machine −
sudo docker run -it centos /bin/bash
Note the following points about the above sudo command −
We are using the sudo command to ensure that it runs with root access.
Here, centos is the name of the image we want to download from Docker Hub and install on our Ubuntu machine.
─it is used to mention that we want to run in interactive mode.
/bin/bash is used to run the bash shell once CentOS is up and running.
Displaying Docker Images
To see the list of Docker images on the system, you can issue the following command.
docker images
Downloading Docker Images
Images can be downloaded from Docker Hub using the Docker run command. Let’s see in detail how we can do this.
Syntax
The following syntax is used to run a command in a Docker container.
docker run image
Removing Docker Images
The Docker images on the system can be removed via the docker rmi command. Let’s look at this command in more detail.
docker rmi
This command is used to remove Docker images.
Syntax
docker rmi ImageID
Return Value
The output will show only the Image ID’s of the images on the Docker host.
Example
sudo docker images -q
docker inspect
This command is used see the details of an image or container.
Syntax
docker inspect Repository
Options
Repository − This is the name of the Image.
Running a Container
Running of containers is managed with the Docker run command. To run a container in an interactive mode, first launch the Docker container.
sudo docker run –it centos /bin/bashThen hit Crtl+p and you will return to your OS shell.
Listing of Containers
One can list all of the containers on the machine via the docker ps command. This command is used to return the currently running containers.
docker pssudo docker ps -adocker history
With this command, you can see all the commands that were run with an image via a container.
Syntax
docker history ImageIDdocker top
With this command, you can see the top processes within a container.
Syntax
docker top ContainerIDdocker stop
This command is used to stop a running container.
Syntax
docker stop ContainerIDdocker rm
This command is used to delete a container.
Syntax
docker rm ContainerIDdocker stats
This command is used to provide the statistics of a running container.
Syntax
docker stats ContainerIDdocker attach
This command is used to attach to a running container.
Syntax
docker attach ContainerIDdocker pause
This command is used to pause the processes in a running container.
Syntax
docker pause ContainerIDdocker unpause
This command is used to unpause the processes in a running container.
Syntax
docker unpause ContainerIDdocker kill
This command is used to kill the processes in a running container.
Syntax
docker kill ContainerIDDocker – Container Lifecycle
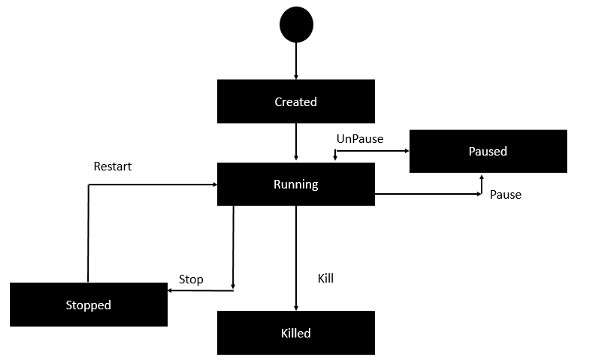
The following illustration explains the entire lifecycle of a Docker container.
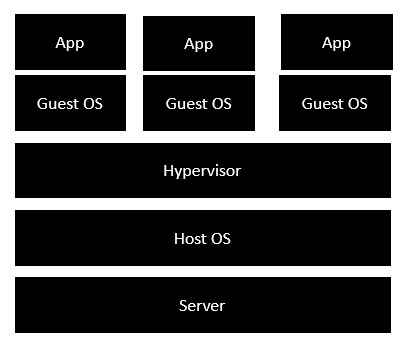
Architecture of virtualization.
service docker stop
This command is used to stop the Docker daemon process.
Syntax
service docker stopsudo docker run –it centos /bin/bashWe used this command to create a new container and then used the Ctrl+P+Q command to exit out of the container. It ensures that the container still exists even after we exit from the container.
A Docker File is a simple text file with instructions on how to build your images.
The following steps explain how you should go about creating a Docker File.
Step 1 − Create a file called Docker File and edit it using vim. Please note that the name of the file has to be "Dockerfile" with "D" as capital.
Step 2 − Build your Docker File using the following instructions.
  #This is a sample Image
  FROM ubuntu
  MAINTAINER demousr@gmail.com

  RUN apt-get update
  RUN apt-get install –y nginx
  CMD [“echo”,”Image created”]
The first line "#This is a sample Image" is a comment. You can add comments to the Docker File with the help of the # command
The next line has to start with the FROM keyword. It tells docker, from which base image you want to base your image from. In our example, we are creating an image from the ubuntu image.
The next command is the person who is going to maintain this image. Here you specify the MAINTAINER keyword and just mention the email ID.
The RUN command is used to run instructions against the image. In our case, we first update our Ubuntu system and then install the nginx server on our ubuntu image.
The last command is used to display a message to the user.
docker build
This method allows the users to build their own Docker images.
Syntax
docker build -t ImageName:TagName dirOptions
-t − is to mention a tag to the image
ImageName − This is the name you want to give to your image.
TagName − This is the tag you want to give to your image.
Dir − The directory where the Docker File is present.
Docker Hub:
Step 1 − Log into Docker Hub and create your repository. This is the repository where your image will be stored. Go to https://hub.docker.com/ and log in with your credentials.
Step 1 − Log into Docker Hub and create your repository. This is the repository where your image will be stored. Go to https://hub.docker.com/ and log in with your credentials.
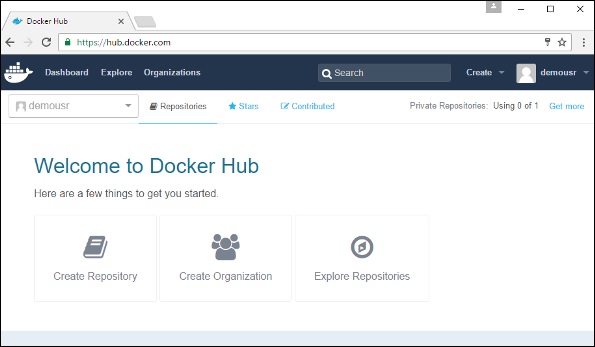
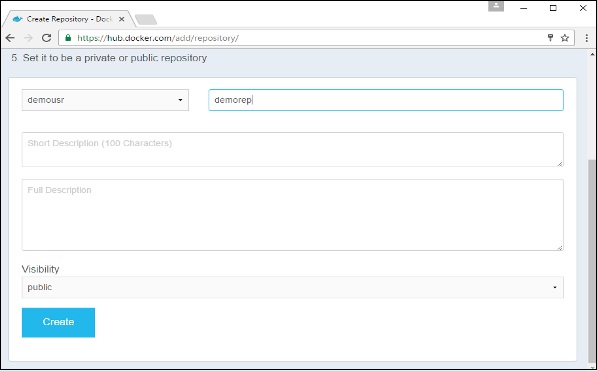
Step 2 − Click the button "Create Repository" on the above screen and create a repository with the name demorep. Make sure that the visibility of the repository is public.
Once the repository is created, make a note of the pull command which is attached to the repository.
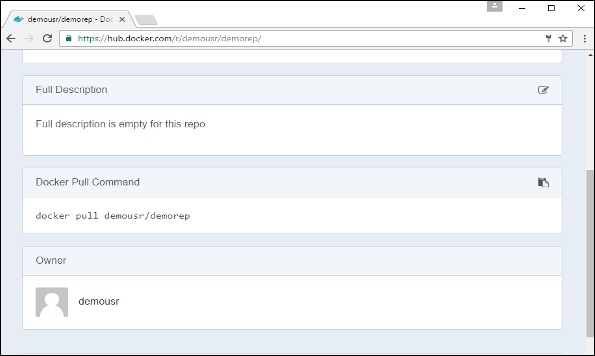
The pull command which will be used in our repository is as follows −
docker pull demousr/demorepStep 3 − Now go back to the Docker Host. Here we need to tag our myimage to the new repository created in Docker Hub. We can do this via the Docker tag command.
We will learn more about this tag command later in this chapter.
Step 4 − Issue the Docker login command to login into the Docker Hub repository from the command prompt. The Docker login command will prompt you for the username and password to the Docker Hub repository.

Step 5 − Once the image has been tagged, it’s now time to push the image to the Docker Hub repository. We can do this via the Docker push command. We will learn more about this command later in this chapter.
docker tag
This method allows one to tag an image to the relevant repository.
Syntax
docker tag imageID RepositorynameOptions
imageID − This is the ImageID which needs to be tagged to the repository.
Repositoryname − This is the repository name to which the ImageID needs to be tagged to.
Return Value
None
Example
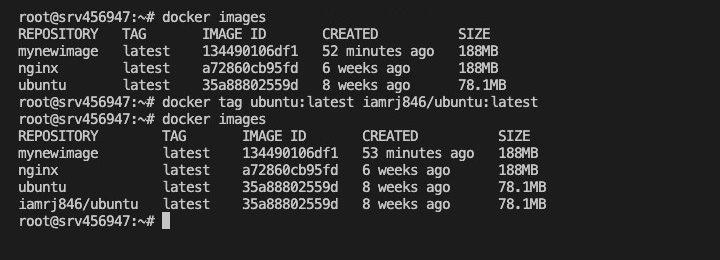
sudo docker tag ab0c1d3744dd demousr/demorep:1.0
Output
A sample output of the above example is given below.
docker push
This method allows one to push images to the Docker Hub.
Syntax
docker push Repositoryname
Options
- Repositoryname − This is the repository name which needs to be pushed to the Docker Hub.
Return Value
The long ID of the repository pushed to Docker Hub.
Example
sudo docker push demousr/demorep:1.0
Output

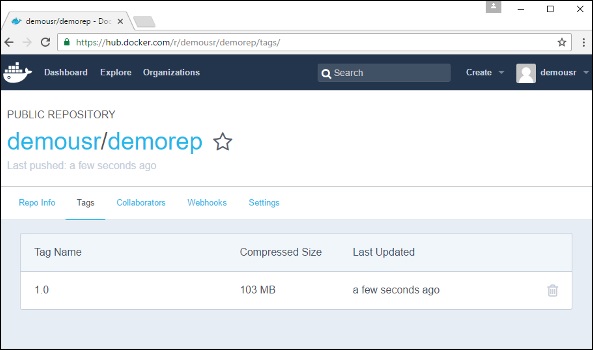
If you go back to the Docker Hub page and go to your repository, you will see the tag name in the repository.
Step 1 − First, you need to do a simple sign-up on Docker Hub.
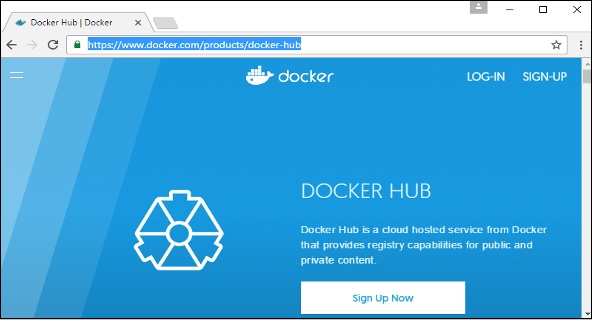
Step 2 − Once you have signed up, you will be logged into Docker Hub.

Step 3 − Next, let’s browse and find the Jenkins image.
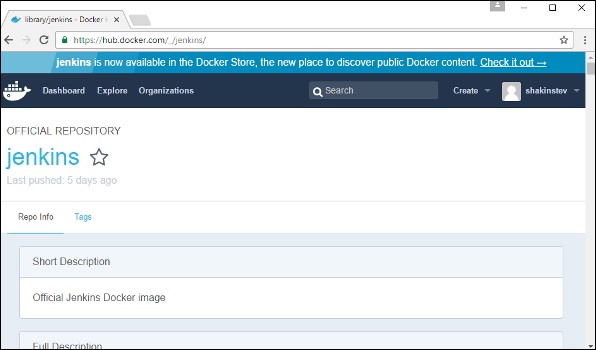
Step 4 − If you scroll down on the same page, you can see the Docker pull command. This will be used to download the Jenkins Image onto the local Ubuntu server.
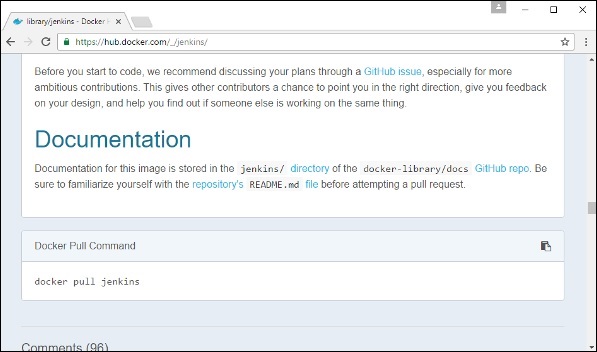
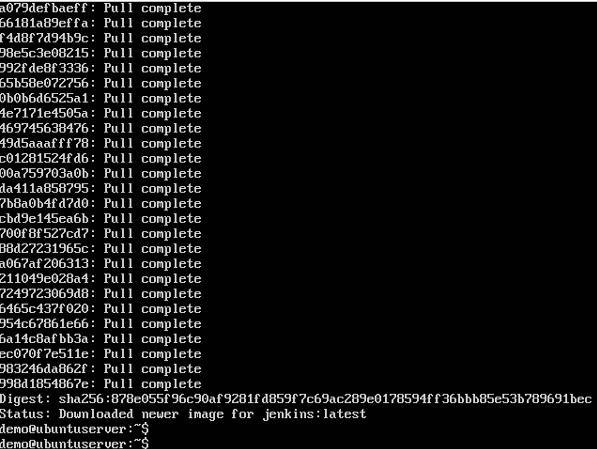
Step 5 − Now go to the Ubuntu server and run the command −
sudo docker pull jenkins
Step 6 − To understand what ports are exposed by the container, you should use the Docker inspect command to inspect the image.
Let’s now learn more about this inspect command.
docker inspect
This method allows one to return low-level information on the container or image.
Syntax
docker inspect Container/Image
Options
- Container/Image − The container or image to inspect
Return Value
The low-level information of the image or container in JSON format.
Example
sudo docker inspect jenkins
Output

The output of the inspect command gives a JSON output. If we observe the output, we can see that there is a section of "ExposedPorts" and see that there are two ports mentioned. One is the data port of 8080 and the other is the control port of 50000.
To run Jenkins and map the ports, you need to change the Docker run command and add the ‘p’ option which specifies the port mapping. So, you need to run the following command −
sudo docker run -p 8080:8080 -p 50000:50000 jenkins
The left-hand side of the port number mapping is the Docker host port to map to and the right-hand side is the Docker container port number.
When you open the browser and navigate to the Docker host on port 8080, you will see Jenkins up and running.
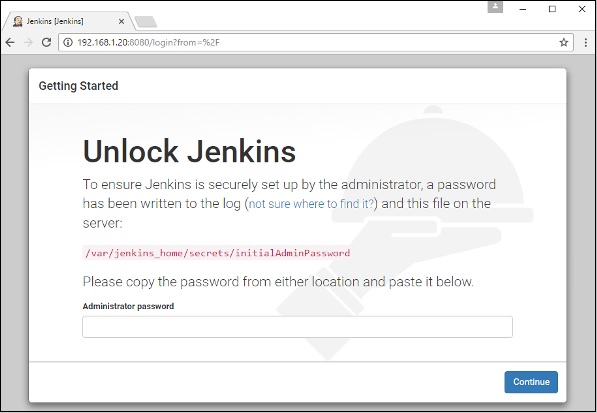
Docker - Private Registries
Step 1 − Use the Docker run command to download the private registry. This can be done using the following command.
sudo docker run –d –p 5000:5000 –-name registry registry:2
The following points need to be noted about the above command −
Registry is the container managed by Docker which can be used to host private repositories.
The port number exposed by the container is 5000. Hence with the –p command, we are mapping the same port number to the 5000 port number on our localhost.
We are just tagging the registry container as “2”, to differentiate it on the Docker host.
The –d option is used to run the container in detached mode. This is so that the container can run in the background

Step 2 − Let’s do a docker ps to see that the registry container is indeed running.

We have now confirmed that the registry container is indeed running.
Step 3 − Now let’s tag one of our existing images so that we can push it to our local repository. In our example, since we have the centos image available locally, we are going to tag it to our private repository and add a tag name of centos.
sudo docker tag 67591570dd29 localhost:5000/centos
The following points need to be noted about the above command −
67591570dd29 refers to the Image ID for the centos image.
localhost:5000 is the location of our private repository.
We are tagging the repository name as centos in our private repository.
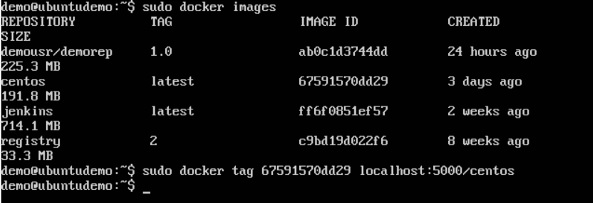
Step 4 − Now let’s use the Docker push command to push the repository to our private repository.
sudo docker push localhost:5000/centos
Here, we are pushing the centos image to the private repository hosted at localhost:5000.
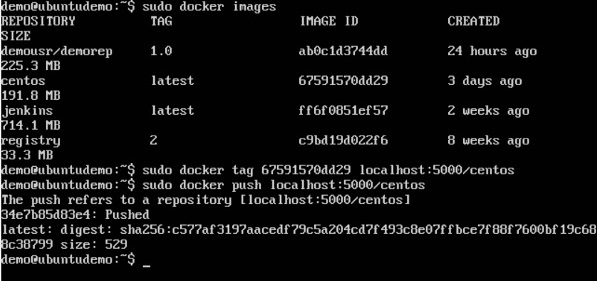
Step 5 − Now let’s delete the local images we have for centos using the docker rmi commands. We can then download the required centos image from our private repository.
sudo docker rmi centos:latest
sudo docker rmi 67591570dd29

Step 6 − Now that we don’t have any centos images on our local machine, we can now use the following Docker pull command to pull the centos image from our private repository.
sudo docker pull localhost:5000/centos
Here, we are pulling the centos image to the private repository hosted at localhost:5000.
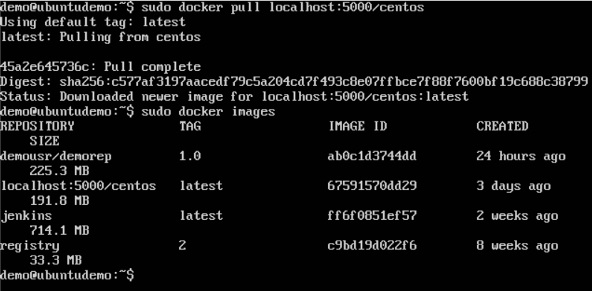
Docker - Building a Web Server Docker File
Step 1 − The first step is to build our Docker File. Let’s use vim and create a Docker File with the following information.
FROM ubuntu
RUN apt-get update
RUN apt-get install –y apache2
RUN apt-get install –y apache2-utils
RUN apt-get clean
EXPOSE 80 CMD [“apache2ctl”, “-D”, “FOREGROUND”]
Step 2 − Run the Docker build command to build the Docker file. It can be done using the following command −
sudo docker build –t=”mywebserver” .
Step 3 − Now that the web server file has been built, it’s now time to create a container from the image. We can do this with the Docker run command.
sudo docker run –d –p 80:80 mywebserver
The following points need to be noted about the above command −
The port number exposed by the container is 80. Hence with the –p command, we are mapping the same port number to the 80 port number on our localhost.
The –d option is used to run the container in detached mode. This is so that the container can run in the background.
Docker - Instruction Commands
CMD Instruction
This command is used to execute a command at runtime when the container is executed.
Syntax
CMD command param1Options
command − This is the command to run when the container is launched.
param1 − This is the parameter entered to the command.
Return Value
The command will execute accordingly.
Example
In our example, we will enter a simple Hello World echo in our Docker File and create an image and launch a container from it.
Step 1 − Build the Docker File with the following commands −
    FROM ubuntu
    MAINTAINER demousr@gmail.com
    CMD [“echo” , “hello world”]
ENTRYPOINT
This command can also be used to execute commands at runtime for the container. But we can be more flexible with the ENTRYPOINT command.
Syntax
ENTRYPOINT command param1
Options
command − This is the command to run when the container is launched.
param1 − This is the parameter entered into the command.
Step 1 − Build the Docker File with the following commands −
    FROM ubuntu
    MAINTAINER demousr@gmail.com
    ENTRYPOINT [“echo”]

Step 2 − Build the image using the Docker build command.
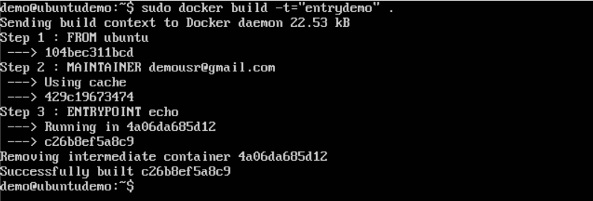
Step 3 − Run a container from the image.
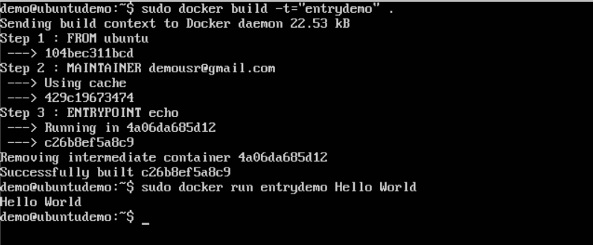
ENV
This command is used to set environment variables in the container.
Syntax
ENV key value
Options
Key − This is the key for the environment variable.
value − This is the value for the environment variable.
Return Value
The command will execute accordingly.
Example
In our example, we will enter a simple echo command in our Docker File and create an image and launch a container from it.
Step 1 − Build the Docker File with the following commands −
    FROM ubuntu
    MAINTAINER demousr@gmail.com
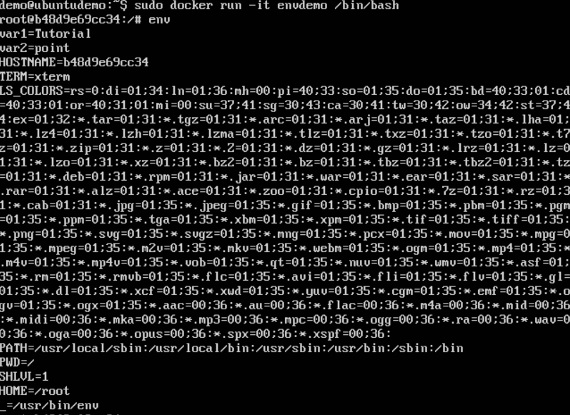
    ENV var1=Tutorial var2=point

Step 2 − Build the image using the Docker build command.
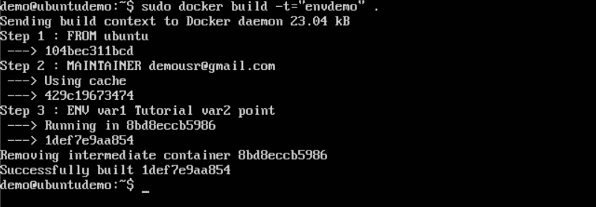
Step 3 − Run a container from the image.
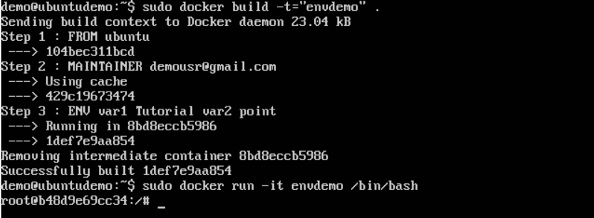
Step 4 − Finally, execute the env command to see the environment variables.
WORKDIR
This command is used to set the working directory of the container.
Syntax
WORKDIR dirname
Options
- dirname − The new working directory. If the directory does not exist, it will be added.
Return Value
The command will execute accordingly.
Example
In our example, we will enter a simple echo command in our Docker File and create an image and launch a container from it.
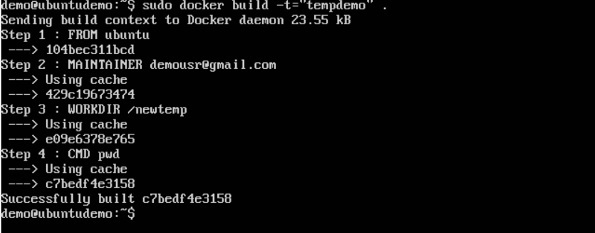
Step 1 − Build the Docker File with the following commands −
    FROM ubuntu
    MAINTAINER demousr@gmail.com
    WORKDIR /newtemp
    CMD pwd

Step 2 − Build the image using the Docker build command.
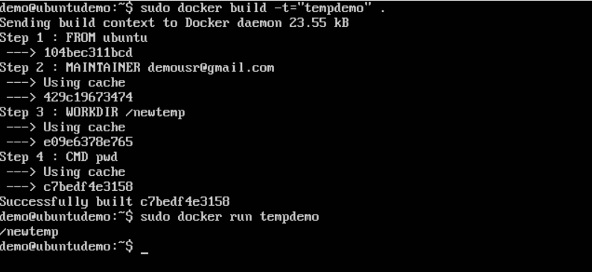
Step 3 − Run a container from the image.
Docker - Container Linking
Container Linking allows multiple containers to link with each other. It is a better option than exposing ports. Let’s go step by step and learn how it works.
Step 1 − Download the Jenkins image, if it is not already present, using the Jenkins pull command.
Step 1 − Download the Jenkins image, if it is not already present, using the Jenkins pull command.

Step 2 − Once the image is available, run the container, but this time, you can specify a name to the container by using the –-name option. This will be our source container.

Step 3 − Next, it is time to launch the destination container, but this time, we will link it with our source container. For our destination container, we will use the standard Ubuntu image.

When you do a docker ps, you will see both the containers running.
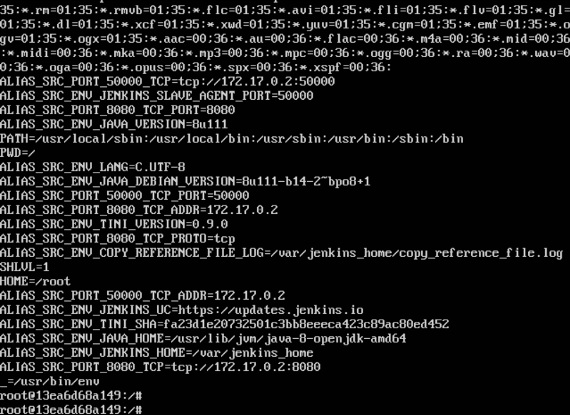
Step 4 − Now, attach to the receiving container.

Then run the env command. You will notice new variables for linking with the source container.

Docker - Storage
Storage Drivers
Docker has multiple storage drivers that allow one to work with the underlying storage devices. The following table shows the different storage drivers along with the technology used for the storage drivers.
| Technology | Storage Driver | | --- | --- | | OverlayFS | overlay or overlay2 | | AUFS | aufs | | Btrfs | brtfs | | Device Manager | devicemanager | | VFS | vfs | | ZFS | zfs |
Data Volumes
In Docker, you have a separate volume that can shared across containers. These are known as data volumes. Some of the features of data volume are −
They are initialized when the container is created.
They can be shared and also reused amongst many containers.
Any changes to the volume itself can be made directly.
They exist even after the container is deleted.
Let’s look at our Jenkins container. Let’s do a docker inspect to see the details of this image. We can issue the following command to write the output of the docker inspect command to a text file and then view the file accordingly.
sudo docker inspect Jenkins > tmp.txt
When you view the text file using the more command, you will see an entry as JENKINS_HOME=/var/Jenkins_home.
This is the mapping that is done within the container via the Jenkins image.
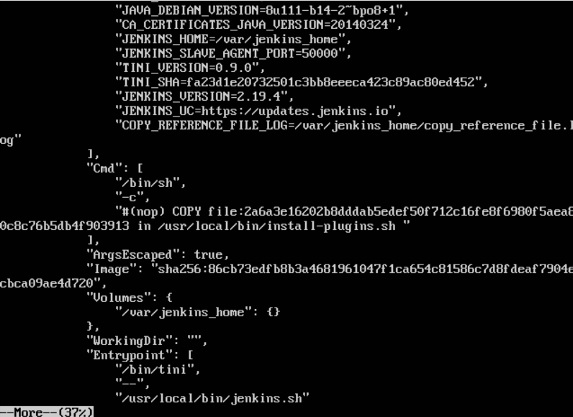
Now suppose you wanted to map the volume in the container to a local volume, then you need to specify the –v option when launching the container. An example is shown below −
sudo docker run –d –v /home/demo:/var/jenkins_home –p 8080:8080 –p 50000:50000 jenkins
The –v option is used to map the volume in the container which is /var/jenkins_home to a location on our Docker Host which is /home/demo.

Now if you go to the /home/demo location on your Docker Host after launching your container, you will see all the container files present there.

Changing the Storage Driver for a Container
If you wanted to change to the storage driver used for a container, you can do so when launching the container. This can be done by using the –volume-driver parameter when using the docker run command. An example is given below −
    sudo docker run –d --volume-driver=flocker
       –v /home/demo:/var/jenkins_home –p 8080:8080 –p 50000:50000 jenkins
The –volume-driver option is used to specify another storage driver for the container.

To confirm that the driver has been changed, first let’s use the docker ps command to see the running containers and get the container ID. So, issue the following command first −
sudo docker ps
Then issue a docker inspect against the container and put the output in a text file using the command.
sudo docker inspect 9bffb1bfebee > temp.txt

If you browse through the text file and go to the line which says VolumeDriver, you will see that the driver name has been changed.
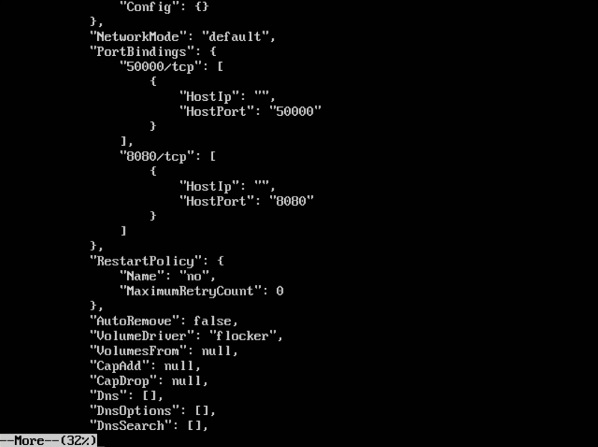
Creating a Volume
A volume can be created beforehand using the docker command. Let’s learn more about this command.
Syntax
docker volume create –-name=volumename –-opt options
Options
name − This is the name of the volume which needs to be created.
opt − These are options you can provide while creating the volume.
Return Value
The command will output the name of the volume created.
Example
sudo docker volume create –-name = demo –opt o = size = 100m
In the above command, we are creating a volume of size 100MB and with a name of demo.
Output
The output of the above command is shown below −

Listing all the Volumes
You can also list all the docker volumes on a docker host. More details on this command is given below −
Syntax
docker volume ls
Options
None
Return Value
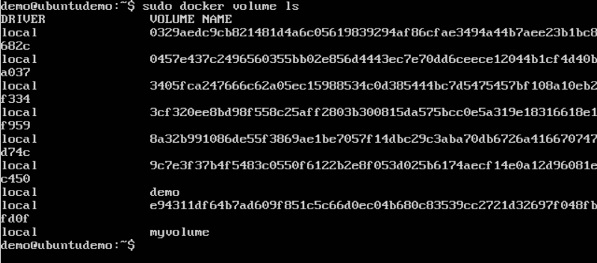
The command will output all the volumes on the docker host.
Example
sudo docker volume ls
Output
The output of the above command is shown below −
Docker - Networking
Docker takes care of the networking aspects so that the containers can communicate with other containers and also with the Docker Host. If you do an ifconfig on the Docker Host, you will see the Docker Ethernet adapter. This adapter is created when Docker is installed on the Docker Host.
This is a bridge between the Docker Host and the Linux Host. Now let’s look at some commands associated with networking in Docker.
Listing All Docker Networks
This command can be used to list all the networks associated with Docker on the host.
Syntax
docker network lsInspecting a Docker network
If you want to see more details on the network associated with Docker, you can use the Docker network inspect command.
Syntax
docker network inspect networknameReturn Value
The command will output all the details about the network.
Example
sudo docker network inspect bridgesudo docker run –it ubuntu:latest /bin/bashNow if we inspect our network name via the following command, you will now see that the container is attached to the bridge.
sudo docker network inspect bridgeCreating Your Own New Network
One can create a network in Docker before launching containers. This can be done with the following command −
Syntax
docker network create –-driver drivername namedrivername − This is the name used for the network driver.
name − This is the name given to the network.
You can now attach the new network when launching the container. So let’s spin up an Ubuntu container with the following command −
sudo docker run –it –network=new_nw ubuntu:latest /bin/bashAnd now when you inspect the network via the following command, you will see the container attached to the network.
sudo docker network inspect new_nw
