#90DaysofDevops:#26 Jenkins Advanced


What is Pipeline - A pipeline is a collection of steps or jobs interlinked in a sequence.
Declarative: Declarative is a more recent and advanced implementation of a pipeline as a code.
Scripted: Scripted was the first and most traditional implementation of the pipeline as a code in Jenkins. It was designed as a general-purpose DSL (Domain Specific Language) built with Groovy.
Why you should have a Pipeline
The definition of a Jenkins Pipeline is written into a text file (called a Jenkinsfile) which in turn can be committed to a project’s source control repository.
This is the foundation of "Pipeline-as-code"; treating the CD pipeline as a part of the application to be versioned and reviewed like any other code.
Creating a Jenkinsfile and committing it to source control provides a number of immediate benefits:
Automatically creates a Pipeline build process for all branches and pull requests.
Code review/iteration on the Pipeline (along with the remaining source code).
Pipeline syntax
pipeline {
    agent any
    stages {
        stage('Build') {
            steps {
                //
            }
        }
        stage('Test') {
            steps {
                //
            }
        }
        stage('Deploy') {
            steps {
                //
            }
        }
    }
}
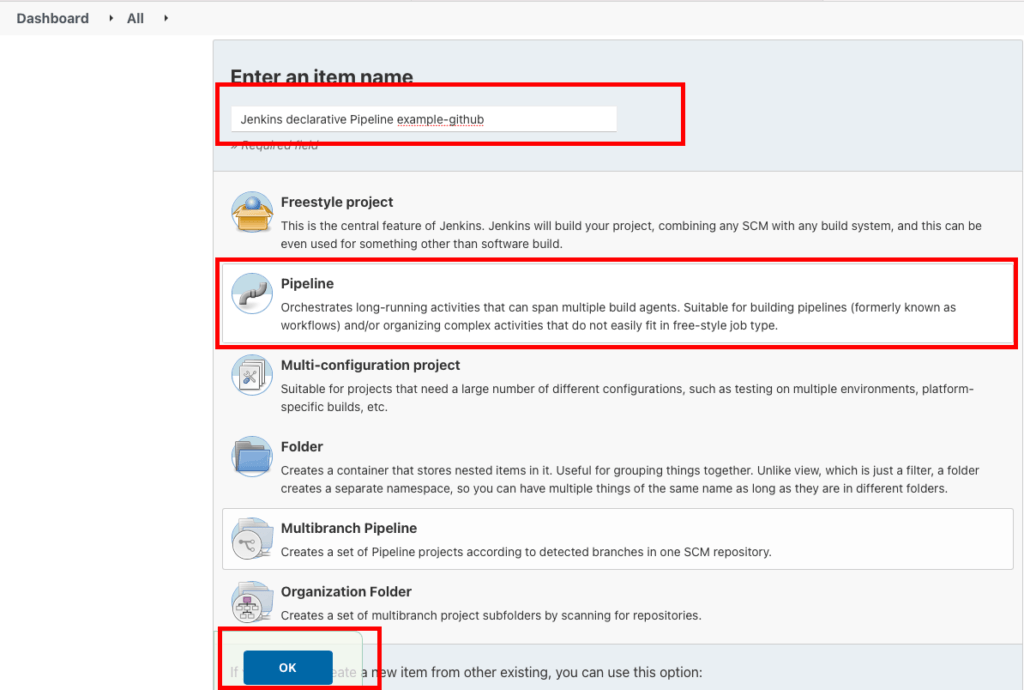
Create a Pipeline jobs in Jenkins
Provide the pipeline name, select Pipeline, and click on the ok button.
Provide the pipeline name, select Pipeline, and click on the ok button.
Now go to the pipeline session, paste the code below, and click on the Save button.
pipeline {
    agent any
    stages {
        stage('Build') {
            steps {
                // Get some code from a GitHub repository
                git url: 'https://github.com/devkrgoutam/jenkins-        pipeline.git', branch: 'main'
                // Change file permisson
                sh "chmod +x -R ./jenkins"
                // Run shell script
                sh "./jenkins/script/scripted_pipeline_ex_2.sh"
            }
        }
    }
}
Code explanation
Pipeline
- The Declarative pipeline should start with the mandatory pipeline block.
Agent
- Agent signifies where the Jenkins build job should run. In this case, we have selected an agent as any
Stages/stage
stages block consists of different executable stage blocks.
At least one stage block is mandatory inside the stages block.
In this example, we have defined two stages(build and Deploy)
Steps
Steps blocks consist of the actual operation which needs to be performed inside Jenkins.
In this example, we are naming Stage as Build
In the next step, we are cloning the git repo “https://github.com/naiveskill/devops.git”
Once the code is successfully pulled from git, we need to change the file permission before running the script.
Finally, we are running a shell script file scripted_pipeline_ex_2.sh which basically prints out “HELLO WORLD”
 #!/bin/sh
 echo "HELLO WORLD"
Click on the save button to save the Pipeline.
Now, click on the build now button and wait for the Jenkins job to finish.
Once the job runs successfully, you can view the logs by clicking on the Logs button.
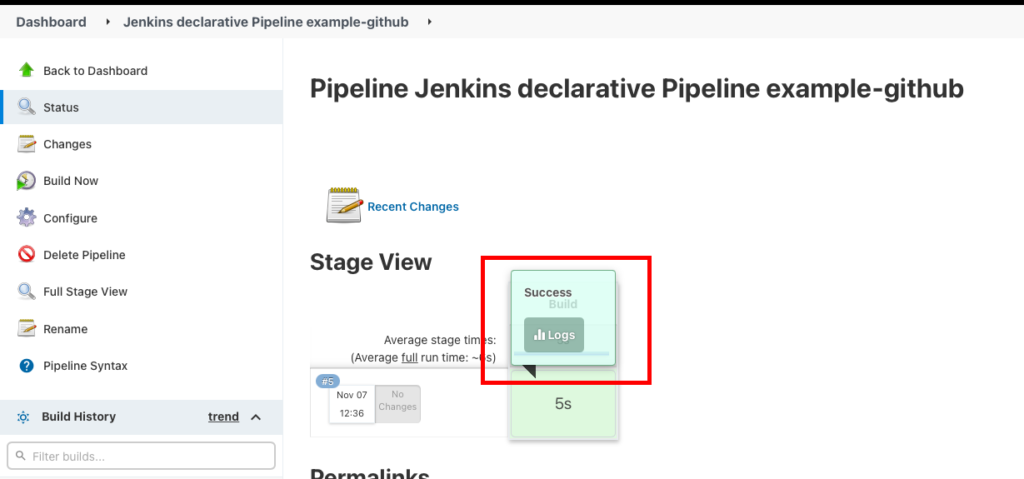
Expand the final shell script logs to see the final “HELLO WORLD” as output

Jenkins pipeline github with credentials
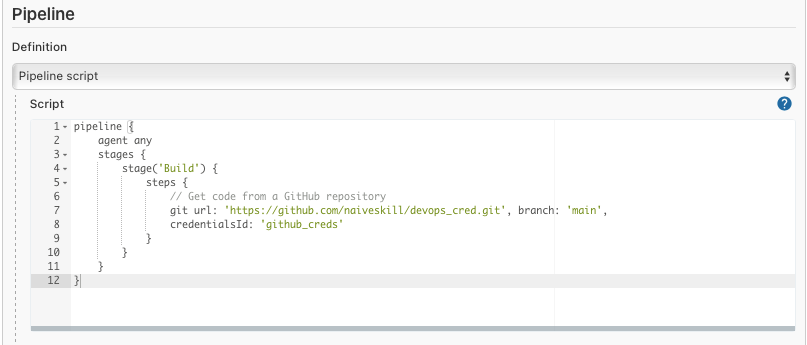
If the git repository is private, you pass the credentials while pulling the code from the github. The Jenkins pipeline github with credentials looks like below.
pipeline {
    agent any
    stages {
        stage('Build') {
            steps {
                // Get code from a GitHub repository
                git url: 'https://github.com/devkrgoutam/devops_cred.git', branch: 'main',
                 credentialsId: 'github_creds'
            }
        }
    }
}
To create the git credentials, follow the below steps.
Jenkins github add credentials
To create the github credentials, we need to generate the github token, which will work in place of your github password.
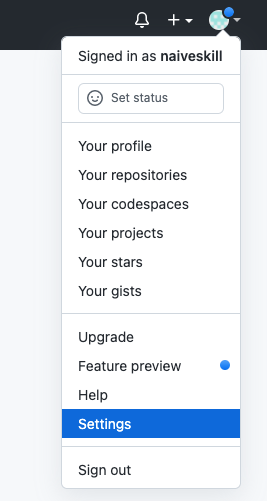
To create a github token, log in to the github account and go to setting
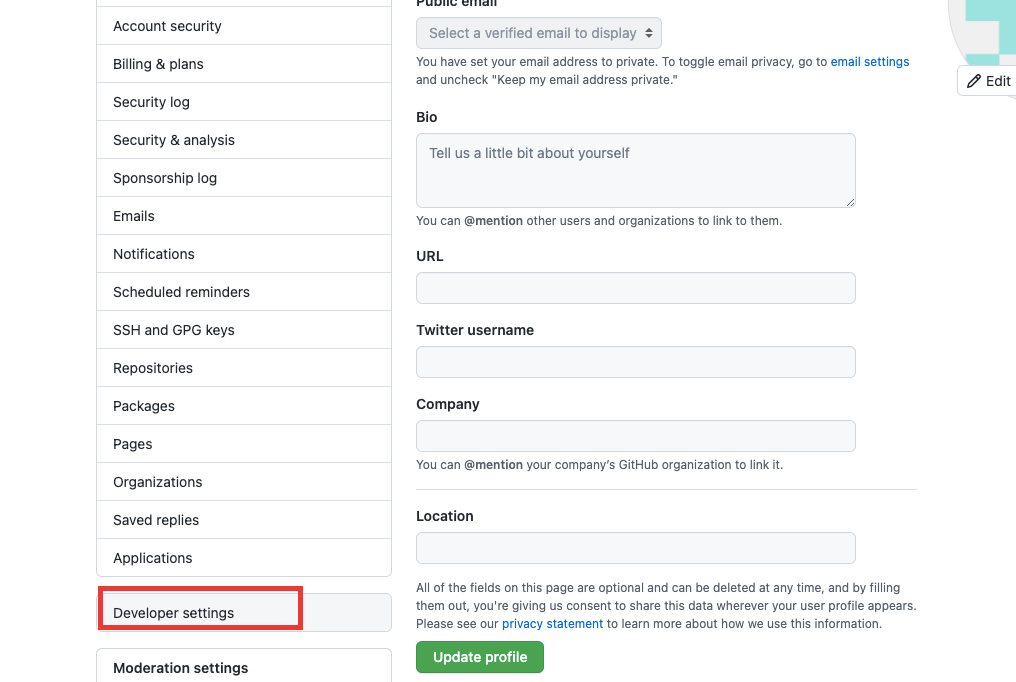
Now click on the developer setting
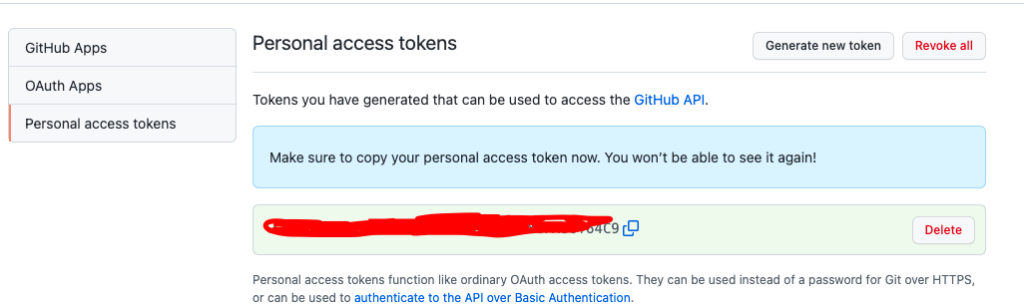
Now click on personal access tokens > Generate new token.
Provide necessary as per your need and click on Generate token. A token will be generated, which you can use for authenticating the github.
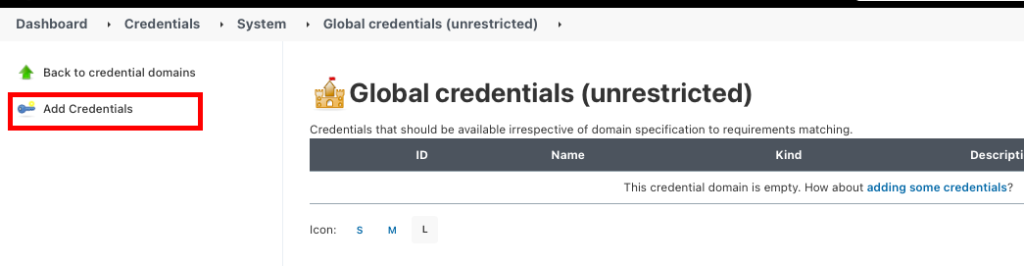
Now go to Jenkins URL and goto credentials > global credentials and click on add credentials.
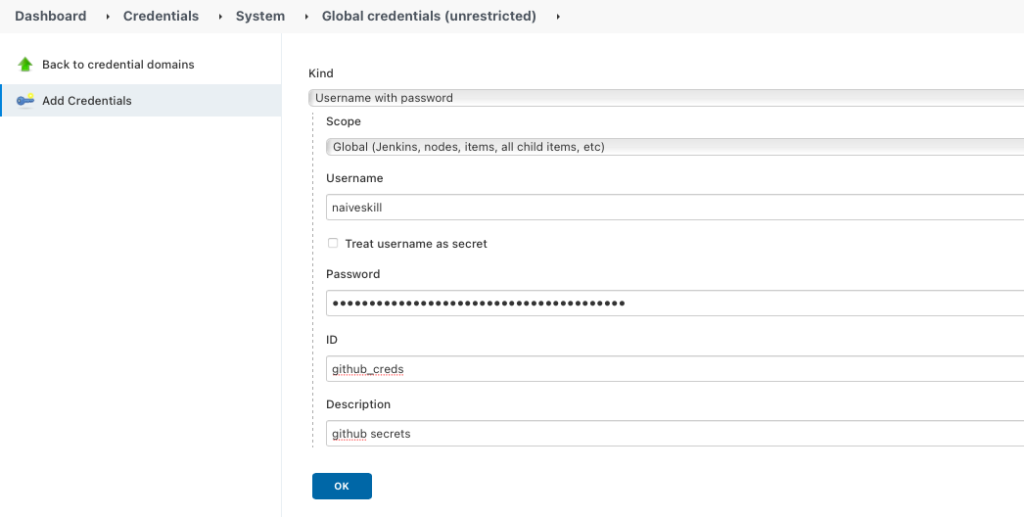
Provide username and github secrets in place of password and then click on the OK button.
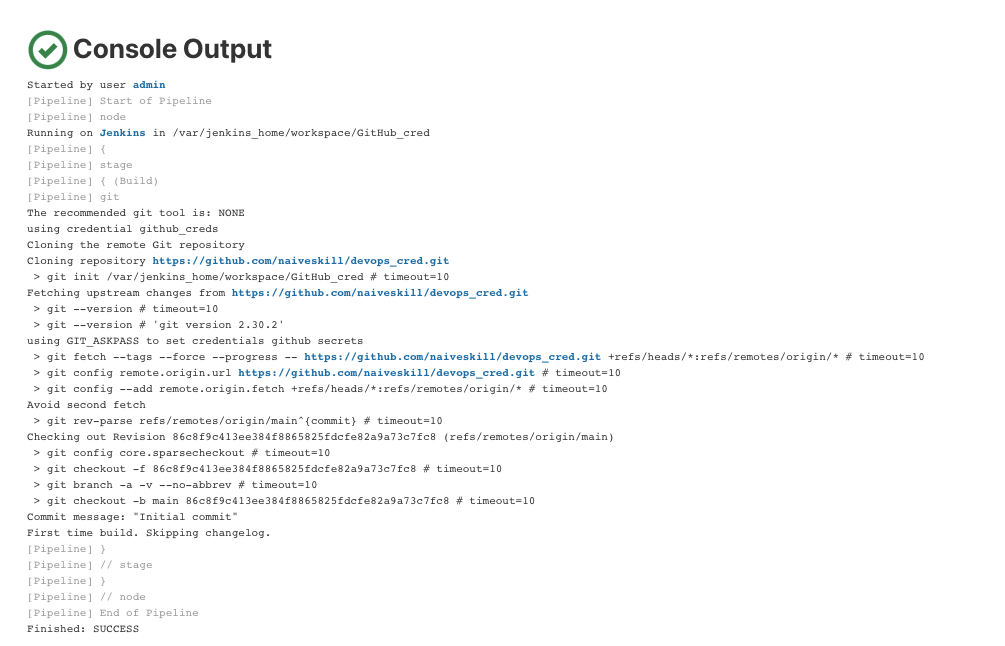
Now Goto the Jenkins job where you have pasted the below code and click on build now.
The logs for the successful run will look like this below
Jenkins pipeline git checkout SCM
To use the SCM, you need to install the github plugin. The github plugging provides the SCM implementation, which can be used with the Pipeline SCM checkout step.
With the git step, you can only perform a few basic checkouts, but more advanced operations require the checkout step rather than the git step. The checkout step is the preferred SCM checkout method due to the broad functionality it provides.
Below is the example pipeline with SCM steps implemented
pipeline {
    agent any
    stages {
        stage('Build') {
            steps {
              checkout([$class: 'GitSCM',
                branches: [[name: '*/main']],
                doGenerateSubmoduleConfigurations: false,
                extensions: [[$class: 'CleanCheckout']],
                submoduleCfg: [],
                userRemoteConfigs: [[url: 'https://github.com/devkrgoutam/devops.git']]])
              sh "ls -ltr"
          }
        }
    }
}
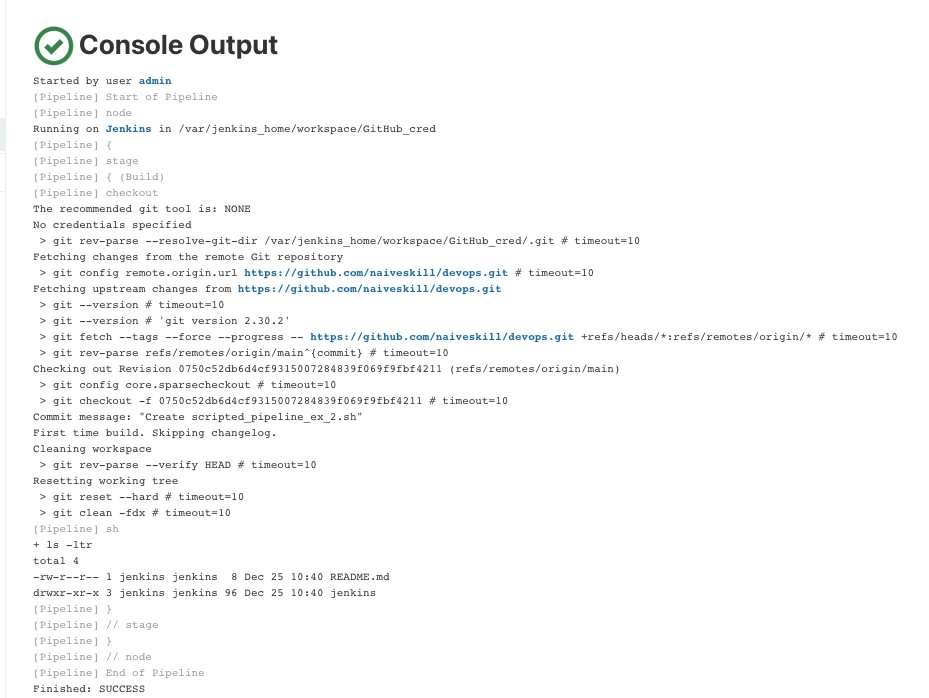
Paste the code into the pipeline block and build the pipeline. On successful RAN you will get the below output.
Many customizations we can do using the GITSCM plugin. More information about the SCM plugging can be found here
Jenkins sample ci/cd pipeline using github
We can use Jenkins and github to create a complete ci/cd pipeline. Such pipelines are used to automate the building, testing, and deployment of software changes from a GitHub repository.
Below is the sample CI/CD GitHub pipeline:
pipeline {
    agent any
    options {
        skipDefaultCheckout true
    }

    stages {
        stage('Clone Repository') {
            steps {
                git branch: "${env.BRANCH_NAME}", url: "${env.REPO_URL}"
            }
        }

        stage('Build') {
            steps {
                sh './gradlew build'
            }
        }

        stage('Test') {
            steps {
                sh './gradlew test'
            }
        }

        stage('Deploy') {
            steps {
                sh './deploy.sh'
            }
        }
    }

    post {
        always {
            githubStatus context: 'continuous-integration/jenkins', state: 'success'
            if (env.CHANGE_ID) {
                githubComment message: "The pipeline completed successfully!"
                githubLabel labels: ['approved']
            }
        }
    }
}
The above pipeline defines a Jenkins pipeline with four stages: “Clone Repository”, “Build”, “Test”, and “Deploy”.
The “Clone Repository” stage checks out the code from a GitHub repository using the repository URL and branch name from the environment variables.
The “Build” stage runs a command to build the application using Gradle.
The “Test” stage runs a command to test the application using Gradle.
The “Deploy” stage runs a command to deploy the application using a shell script.
The post-build action sends the build status to GitHub with a context of “continuous-integration/jenkins” and state of “success”, and also adds a comment on Github like “The pipeline completed successfully!” and adds a label ‘approved’.